
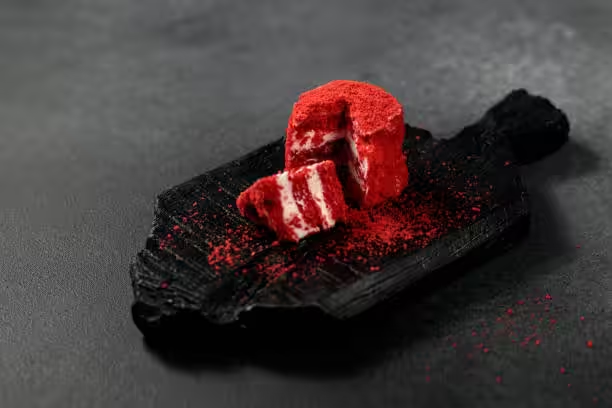
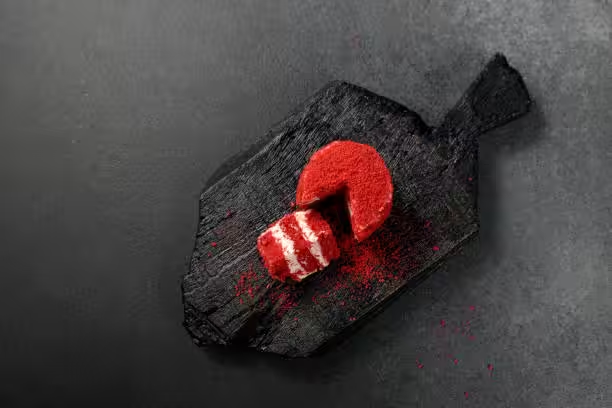
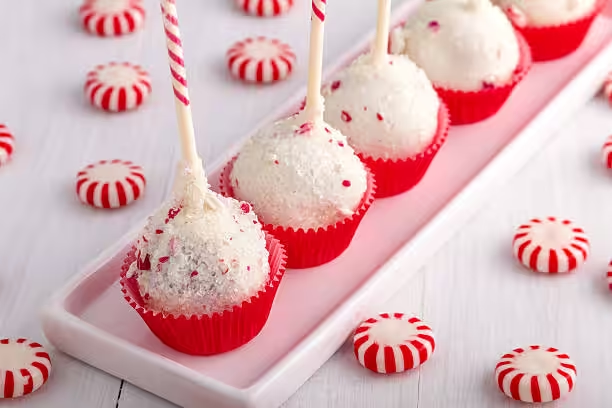
Red velvet cake pops are these tiny, fun treats that mix the rich taste of red velvet cake with the ease of eating something on a stick. Their bright red sponge and smooth white choc coating really stand out on a dessert table. They’re perfect for kids and adults who love something sweet but don’t wanna deal with a whole slice of cake.
Over the past couple years, red velvet cake pops blew up at parties, weddings, and all kinds of events. They look super festive, with that deep red color poking through the coating, and the cocoa-flavored cake inside tastes amazing. It’s not just about the flavor though—these little pops give your dessert spread a touch of class without too much work.
What’s cool is you can change them up any way you want. Add sprinkles, drizzle extra chocolate, or even paint them with coloured icing. Bakers and home cooks alike think theyre great because you get the famous red velvet taste in a fun new way thats easy to share.
What Are Red Velvet Cake Pops?
Red velvet cake pops take the classic red velvet cake and turn it into bite-sized balls on a stick. You crumbled moist red velvet cake and mix it with cream cheese frosting until its soft enough to roll. Then you dip each ball in melted white chocolate or candy melts. The pops keep that signature red color and velvety taste but are way more portable.
Red velvet cake itself dates back to Victorian times, when bakers noticed how buttermilk and cocoa powder made a unique flavor. The South in the US really made it famous, since folks there love that rich, slightly tangy taste. Recently cake pops became trendy, so mixing the two was a no-brainer for anyone who likes fun desserts.
As cake pops got more popular, everyone started making red velvet versions for showers, birthdays, and holiday parties. They satisfy a sweet tooth in just a few bites and impress guests with their bold color and neat form. The combo of soft cake, creamy frosting, and crunchy shell keeps people coming back for more.
Ingredients Needed for Red Velvet Cake Pops
To whip up these tasty bites, you’ll need stuff for the cake, the frosting, and the coating. Here’s what you should gather before you start:
- Cake Ingredients:
- 2 cups all-purpose flour
- 1 ½ cups granulated sugar
- 1 teaspoon baking powder
- 1 teaspoon baking soda
- ½ teaspoon salt
- 1 tablespoon cocoa powder
- 1 cup vegetable oil
- 1 cup buttermilk, at room temperature
- 2 large eggs
- 2 tablespoons red food coloring
- 1 teaspoon vanilla extract
- 1 teaspoon white vinegar
- Frosting Ingredients:
- 1 cup cream cheese, softened
- ½ cup unsalted butter, softened
- 4 cups powdered sugar
- 1 teaspoon vanilla extract
- Coating Ingredients:
- 2 cups white chocolate chips or melting candies
- Sprinkles or decorations (optional)
With these easy-to-find ingredients, you’ll be all set to make your own red velvet cake pops at home.
How to Make Red Velvet Cake Pops
Follow these simple steps to make cake pops that taste like red velvet and look like a pro made them:
Step 1: Baking the Red Velvet Cake
Preheat your oven to 350°F (175°C). Grease two 9-inch round cake pans and dust with flour. In a big bowl, whisk the flour, sugar, baking powder, baking soda, salt, and cocoa powder. Then add oil, buttermilk, eggs, red food coloring, vanilla extract, and vinegar. Mix until it’s smooth.
Pour the batter into the pans evenly and bake for 25–30 minutes, or until a toothpick comes out mostly clean. Let the cakes cool completely in the pans before moving them to a wire rack. If they’re even a bit warm, the pops will turn soggy.
Step 2: Preparing the Frosting
While the cakes cool, beat the softened cream cheese and butter in a bowl until creamy. Slowly add powdered sugar and vanilla extract, mixing until it’s smooth and fluffy. Dont add too much sugar at once or itll get lumpy.
Step 3: Crumbling the Cake
Break the cooled cakes into crumbs with your hands or a fork. Put about one cup of frosting in there and stir until the crumbs are damp but not too sticky. You might need more or less frosting—just stop when you can roll them into balls without them falling apart.
Step 4: Forming the Cake Pops
Roll small scoops of the mixture into balls about an inch wide. Set them on a tray lined with parchment paper. Push a lollipop stick into each ball and chill in the fridge for at least one hour so they hold shape.
Step 5: Coating the Cake Pops
Melt the white chocolate chips or candy melts in a microwave-safe bowl, heating in 30-second bursts and stirring until smooth. Dip each chilled pop into the melted coating, letting the extra drip off. Before it sets, sprinkle sprinkles or decorations if you want. Stick the finished pops into a foam block or stand to dry fully.
Tips for Perfect Red Velvet Cake Pops
- Make sure the cake is totally cool or the frosting melts too quick.
- Add just enough frosting so the balls hold, but dont overdo it or they get greasy.
- Use good-quality melting candy for a glossy shell.
- Try different sprinkles and color combos to match your party theme.
Storing Red Velvet Cake Pops
Store your pops in an airtight container. They keep at room temp for two days or in the fridge for up to a week. If you wanna save longer, freeze the uncoated balls and thaw in the fridge before dipping.
FAQs about Red Velvet Cake Pops
Can I use a different cake flavor?
Yes! Swap red velvet for chocolate, vanilla, or whatever cake you like and follow the same steps.
What decorations work best?
Sprinkles, edible glitter, colored icing—get creative. Just add them before the coating hardens.
How do I stop the coating from cracking?
Make sure pops are super cold before dipping and let the melted chocolate cool just a bit so it’s not too hot.
Can I prep these ahead of time?
Totally. Make them a day or two early and keep in an airtight box. They stay fresh.
red velvet cake pops
Equipment
- 1 mixing bowl
- 1 electric mixer or whisk
- 1 baking pan (9x13 inch)
- 1 cookie sheet
- 1 parchment paper
- 12 lollipop sticks
- 1 microwave-safe bowl
- 1 styrofoam or cake pop stand
- 1 measuring cups and spoons
Ingredients
- 1 ½ cups all-purpose flour
- 1 cup granulated sugar
- 1 teaspoon baking soda
- 1 teaspoon cocoa powder
- ½ teaspoon salt
- 1 cup vegetable oil
- 1 cup buttermilk, room temperature
- 2 large eggs, room temperature
- 2 tablespoon red food coloring
- 1 teaspoon vanilla extract
- 1 teaspoon white vinegar
- 4 oz cream cheese, softened
- 2 cups powdered sugar
- 8 oz semi-sweet chocolate, chopped
- 1 teaspoon solid shortening (optional)
Instructions
- Preheat the oven to 350°F (175°C). Grease and flour the baking pan.
- In a large mixing bowl, sift together the flour, sugar, baking soda, cocoa powder, and salt.
- In another bowl, mix the vegetable oil, buttermilk, eggs, red food coloring, vanilla extract, and vinegar until well combined.
- Gradually add the wet ingredients to the dry ingredients, mixing until smooth.
- Pour the batter into the prepared baking pan and bake for 25 minutes or until a toothpick inserted in the center comes out clean.
- Allow the cake to cool completely in the pan, then remove it and crumble it into a large mixing bowl.
- Add the cream cheese and powdered sugar to the crumbled cake and mix until well combined.
- Using your hands, roll the cake mixture into 1-inch balls and place them on a cookie sheet lined with parchment paper.
- Insert a lollipop stick into each ball, and refrigerate for at least 30 minutes until firm.
- Meanwhile, melt the chopped chocolate in a microwave-safe bowl, stirring every 30 seconds until smooth.
- Dip each cake pop into the melted chocolate, letting any excess drip off before placing it back on the parchment-lined tray.
- Allow the chocolate coating to set completely before serving. You can place the cake pops in a stand or styrofoam to help them stand up.
Leave a Reply