
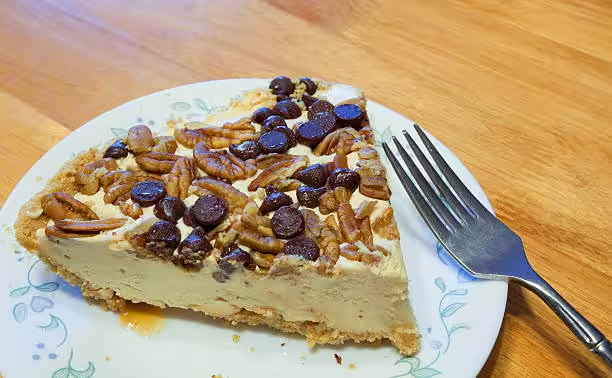
Mixing desserts can get pretty wild, and the Rice Krispie Treat Cheesecake proves it. It squashes together the classic crispy rice cereal treat—with marshmallows and butter—and the velvety cheesecake filling. First you get the crunchy, buttery base, then a smooth cream cheese layer that kinda melts in your mouth. It’s perfect for a party or just a sweet pick-me-up after dinner, and you’ll wanna go back for seconds (or thirds).
In this post we’ll show you how to build one from start to finish, list out all the stuff you need, and offer simple ways to make it your own. Whether you’ve never baked a thing or you’ve made a million cookies, this recipe is easy enough but still looks totally pro. So grab a bowl, turn on some music, and let’s get baking!
1. What is a Rice Krispie Treat Cheesecake?
The Rice Krispie Treat Cheesecake is a mash-up of two desserts everyone loves. You’ve got the chewy, crispy Rice Krispie base and then on top sits a rich, smooth layer of cheesecake. To really get why this works, it helps to know where these treats come from.
Rice Krispie treats was first made back in the 1930s by the Kellogg Company to sell their Rice Bubbles cereal. They only needed three things: Rice Krispies, melted marshmallows and butter. Schools and bake sales all over the US went crazy for them.
Cheesecake is even older. It goes all the way to ancient Greece, where they think athletes at the first Olympic Games ate a simple form of cheesecake for energy. Through the years it changed—Europeans added eggs and cream, Americans added sugar and flavorings—until we got the creamy, tangy version we know today.
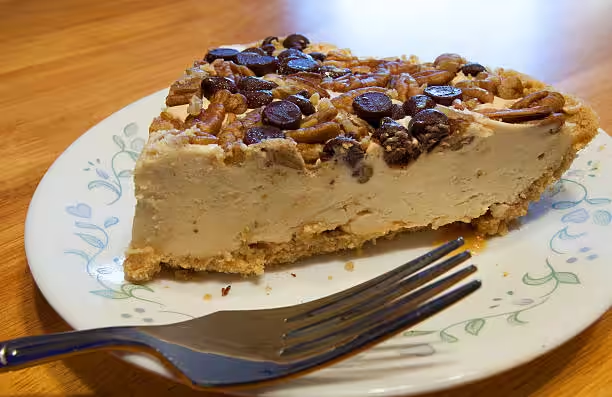
Put those two ideas together, and you’ve got a dessert that’s crunchy, creamy, buttery and slightly tangy all in one bite. It’s popped up at parties and celebrations everywhere, because who can resist a crazy twist on two old favorites?
2. Ingredients Needed for Rice Krispie Treat Cheesecake
Here’s everything you’ll need to whip up this crowd-pleaser:
- For the crust:
- Rice Krispies
- Marshmallows
- Butter
- For the cheesecake filling:
- Cream cheese
- Sugar
- Vanilla extract
- Sour cream
- Eggs
- For the topping:
- Whipped cream
- Extra Rice Krispies or sprinkles
You’ll also want some simple tools to keep things smooth:
- Mixing bowls
- Springform pan
- Spatula
- Whisk or electric mixer
3. Step-by-Step Recipe for Rice Krispie Treat Cheesecake
Got everything ready? Let’s dive in. Follow these steps for a dessert that looks fancy but is actually super simple.
3.1. Preparation
First, pull the cream cheese out of the fridge and let it sit about 30 minutes so it softens. Meanwhile, you can melt the butter for the crust and let it cool a bit.
3.2. Making the Rice Krispie Crust
Ingredients:
- 3 cups Rice Krispies
- 10 oz marshmallows
- 3 tablespoons butter
Directions:
- In a big saucepan, melt the butter on low heat.
- Add marshmallows and stir till they’re all gooey and smooth.
- Take the pan off the heat and gently fold in the Rice Krispies so they’re coated.
- Press the mix into a greased springform pan to make the crust. Let it cool completely before you add the cheesecake part.
3.3. Preparing the Cheesecake Filling
Ingredients:
- 16 oz cream cheese, softened
- 1 cup sugar
- 1 teaspoon vanilla extract
- 1 cup sour cream
- 3 large eggs
Directions:
- In a bowl, beat the cream cheese and sugar with an electric mixer till smooth.
- Stir in the vanilla extract and sour cream until it’s all mixed.
- In another bowl, lightly beat the eggs, then slowly pour them into the cream cheese mix while stirring—don’t overmix or you’ll get lumps.
3.4. Assembly
Pour the cheesecake batter over your cooled Rice Krispie crust. Spread it evenly with a spatula. If you want extra crunch, sprinkle some more Rice Krispies on top.
3.5. Baking and Cooling
Preheat your oven to 325°F (163°C). Bake for 50–60 minutes until the edges look set but the center still jiggles a bit. Let it cool on the counter for an hour, then pop it in the fridge for at least 4 hours (or overnight) so it sets up nice and firm.
3.6. Serving Suggestions
When you’re ready, loosen the springform pan and slide the cheesecake out. Top with whipped cream and more Rice Krispies or colorful sprinkles if you want. Use a sharp knife for clean slices, and dig in!
4. Variations and Customizations for Rice Krispie Treat Cheesecake
This dessert is so flexible you can tweak it any way you like. Try these ideas:
- Chocolate version: Stir cocoa powder into the crust or toss in some chocolate chips with the filling.
- Pumpkin spice: Swap part of the cream cheese for pumpkin puree and add cinnamon and nutmeg—perfect for fall.
- Gluten-free: Use gluten-free rice cereal so anyone can enjoy it.
- Flavor boosts: Mix in almond or lemon extract, or fold in mashed strawberries or blueberries for a fruity twist.
- Vegan option: Try coconut cream instead of cream cheese and use flaxseed or chia seeds as a binder.

Rice Krispie Treat Cheesecake
Equipment
- 1 9-inch springform pan
- multiple mixing bowls
- 1 electric mixer
- 1 saucepan
- 1 rubber spatula
- 1 large spoon
- 1 set measuring cups
- 1 set measuring spoons
Ingredients
- 3 cups Rice Krispies cereal For the crust
- 4 cups mini marshmallows For the crust
- 3 tablespoons unsalted butter For the crust
- 16 oz cream cheese Softened, for the filling
- 1 cup granulated sugar For the filling
- 1 teaspoon vanilla extract For the filling
- 2 large eggs For the filling
- 1 cup sour cream For the filling
- 1 cup heavy whipping cream For topping
- 2 tablespoons powdered sugar For topping
- 1 cup Rice Krispies cereal For garnish
Instructions
- Preheat your oven to 325°F (163°C). Grease the bottom of a 9-inch springform pan.
- In a large saucepan over low heat, melt the butter. Once melted, add the mini marshmallows and stir until completely melted and smooth. Remove from heat.
- Stir in the 3 cups of Rice Krispies cereal until well coated. Press the mixture firmly into the bottom of the prepared springform pan to form an even crust. Set aside to cool.
- In a mixing bowl, beat the softened cream cheese with an electric mixer until creamy.
- Add the granulated sugar and vanilla extract to the cream cheese, beating until smooth.
- Add the eggs one at a time, mixing well after each addition. Finally, add the sour cream and mix until combined.
- Pour the cheesecake filling over the cooled Rice Krispie crust and smooth the top.
- Bake in the preheated oven for 10 minutes. Turn off the oven and leave the cheesecake inside for an additional 30 minutes. This helps prevent cracking.
- Remove the cheesecake from the oven and allow it to cool to room temperature. Refrigerate for at least 4 hours or overnight to set.
- Before serving, whip the heavy cream with the powdered sugar until stiff peaks form. Spread or pipe the whipped cream over the chilled cheesecake.
- Garnish the top with the additional 1 cup of Rice Krispies cereal for added crunch.
- Slice and serve chilled.
Leave a Reply