
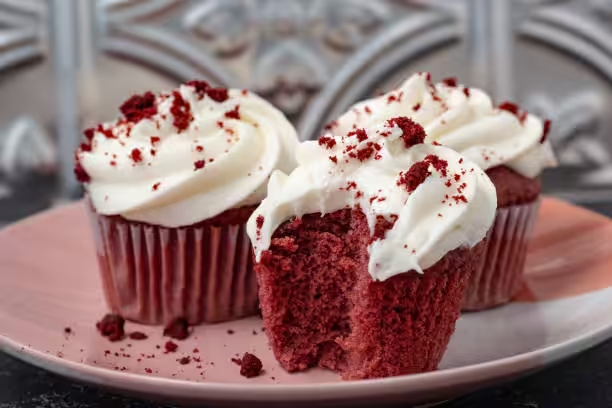
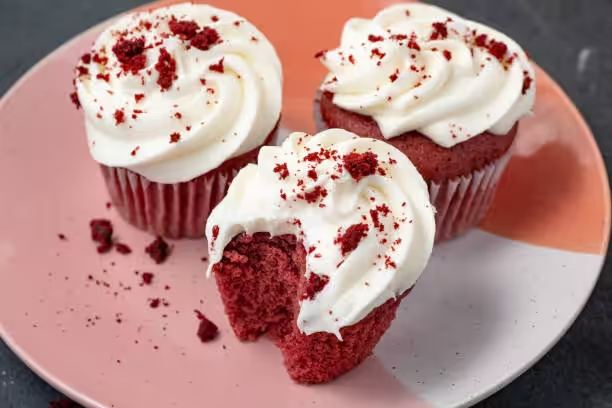
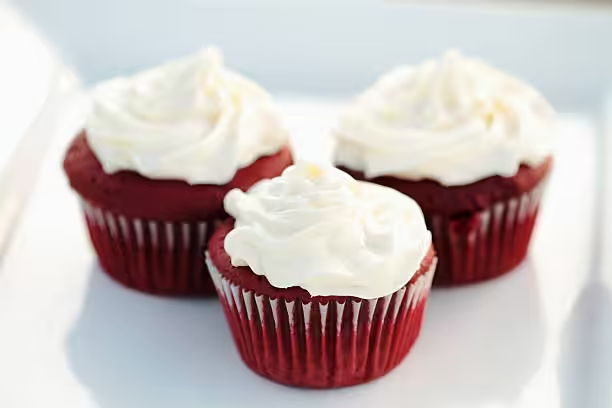
Red velvet cupcakes is a fun and fancy treat that people always seem to talk about. They got this bright red look, soft feel, and just a little bit of cocoa taste mixed with tiny tang from buttermilk. Top it with that creamy cream cheese frosting and you got something that looks awesome and tastes even better.
Even though this cake started way down South, now bakeries everywhere sell red velvet cupcakes. You might find them at birthday parties, weddings, or just chill hangouts with friends. Since so many folks want to make them at home, it helps to know a bit about where they come from, what goes in them, and how to bake them just right.
In this article, you’ll get the story of red velvet cake, learn the main ingredients and why they matter, and see the science behind making your cupcakes rise and stay soft. There’s also a simple recipe with step-by-step instructions and some tips if things go wrong. Whether you’re a baking pro or just starting, this guide will give you the skills to make delicious red velvet cupcakes.
History of Red Velvet Cake
The story of red velvet cake goes back to the Victorian era, when dessert was all about fancy looks and rich taste. People loved the cake’s soft texture and pretty red color. By the 1920s, it was a hit at nice restaurants and special events.
In the South, families baked red velvet cake for gatherings and local bake-offs. They used buttermilk and vinegar to get that tender crumb and slight tang. This mix of flavors made the cake popular in many homes.
As cupcakes became trendy in the 2000s, bakers turned red velvet cake into cupcakes so it was easier to share. Today, red velvet cupcakes are everywhere—from cafes to kitchen tables—and they’re still a symbol of celebration.
Ingredients Breakdown
To make great red velvet cupcakes, each ingredient plays a part. Here’s what you need:
- All-purpose flour: Gives the cupcake its shape and keeps it from falling apart.
- Cocoa powder: Adds a hint of chocolate that balances the sweetness.
- Red food coloring vs natural alternatives: Most recipes use red food coloring, but you can try beet juice or pomegranate for a more natural color.
- Buttermilk: Makes your cupcakes moist and gives a tangy kick.
- Eggs: Hold everything together and help make the texture light.
- Butter vs oil: Butter gives flavor while oil keeps cupcakes super moist. Some people mix both.
Optional extras you might like:
- Vanilla extract: Deepens the flavor.
- Salt: Cuts the sweetness and brings out other tastes.
Knowing why each thing matters will help you bake the perfect batch every time.
The Science of Baking Red Velvet Cupcakes
Baking is like a chemisty experiment. First, when you mix flour with liquid, gluten forms. Too much mixing makes the cupcakes tough, so stir just until you can’t see dry flour.
Next, the acids in buttermilk and vinegar react with baking soda to make bubbles. Those bubbles help the cupcakes get fluffy. If you use baking powder instead, it already has the acid inside, so it can puff up without extra acid.
Your food coloring can change color when it hits the acids and bases in the batter. That’s why some batches look darker or lighter. Using a good brand of coloring usually gives you the nicest red.
Step-by-Step Red Velvet Cupcake Recipe
Ingredients
- Cupcake Batter:
- 2 cups all-purpose flour
- 1 tablespoon cocoa powder
- 1 teaspoon baking soda
- 1 teaspoon salt
- 1 cup vegetable oil (or softened unsalted butter)
- 1 cup granulated sugar
- 1 cup buttermilk, room temperature
- 2 large eggs, room temperature
- 2 tablespoons red food coloring
- 1 teaspoon vanilla extract
- 1 teaspoon white vinegar
Directions
- Preheat oven: Heat to 350°F (175°C) and line a muffin pan with liners.
- Mix dry: In a bowl, whisk flour, cocoa powder, baking soda, and salt.
- Mix wet: In another bowl, beat oil (or butter), sugar, and eggs until smooth. Add buttermilk, food coloring, vanilla, and vinegar.
- Combine: Slowly add dry mix to wet, stirring until just mixed.
- Fill liners: Scoop batter into cupcake cups, about two-thirds full.
- Bake: Bake 18–20 minutes or until a toothpick comes out clean.
- Cool: Let them sit in the pan few minutes, then move to a wire rack to cool completely.
- Frost: Top with cream cheese frosting or another frosting of choice.
Troubleshooting Tips
- Dense cupcakes: You might have overmixed the batter.
- Gooey center: They need a few more minutes in the oven.
- Too dry: Check oven temp and don’t bake too long.
Frosting Ideas and Variations
Frosting takes your cupcakes to the next level. Try these:
- Cream Cheese Frosting: Mix 8 oz cream cheese, ½ cup softened butter, 4 cups powdered sugar, and 1 teaspoon vanilla. Beat until smooth.
- Chocolate Frosting: Add ½ cup unsweetened cocoa powder to basic buttercream for a chocolate twist.
- Vegan Options: Use coconut cream or mashed avocado instead of dairy for a non-dairy frosting.
Decorate with sprinkles, edible glitter, or fresh berries for extra wow factor.
Serving and Storage Tips
These cupcakes go great with coffee, tea, or milk. To keep them fresh, store in an airtight container at room temp up to 2 days. For longer, wrap each cupcake in plastic and freeze up to 3 months. Thaw at room temp before eating.
Nutritional Information
One red velvet cupcake has about 300 calories, plus fat, carbs, and sugar amounts that depend on your exact recipe. To lighten them up, try whole wheat flour, less sugar, or Greek yogurt instead of buttermilk. Gluten-free flour works too if you need it.
FAQs
- What’s different between red velvet and chocolate cupcakes? Red velvet has tang from buttermilk and vinegar, and just a hint of cocoa. Regular chocolate cupcakes are more chocolatey.
- Can I use gel food coloring? Sure. Gel gives a stronger color and you need less of it.
- How do I keep cupcakes moist? Don’t overbake, and use buttermilk or oil for extra moisture.
- What if I don’t have buttermilk? Mix milk with a little vinegar or lemon juice and let it rest for 5 minutes.
- Where did red velvet cake come from? It started in the Victorian era and got big in the Southern US for fancy dinners and family get-togethers.
- Should I refrigerate them? If you use cream cheese frosting, yes. Plain cupcakes are fine at room temp.
- Can I make them gluten-free? Yes. Use a gluten-free baking blend and follow the same recipe.
Conclusion
Red velvet cupcakes are special because of their soft texture, tangy flavor, and bright color. Now that you know about their history, ingredients, and baking tips, you’re ready to bake a perfect batch. Try the classic or get creative—either way, they’re sure to impress.
Call to Action
Subscribe for more tasty recipes and follow us on social media to keep up with our latest kitchen adventures!
red velvet cupcakes
Equipment
- 1 muffin tin (12-cup)
- 12 cupcake liners
- 2 mixing bowls
- 1 electric mixer or whisk
- 1 rubber spatula
- 1 measuring cups
- 1 measuring spoons
- 1 cooling rack
- 1 piping bag (optional for frosting)
Ingredients
- 1 ½ cups all-purpose flour
- 1 cup granulated sugar
- ½ cup unsweetened cocoa powder
- 1 teaspoon baking soda
- ½ teaspoon salt
- 1 cup vegetable oil
- 1 cup buttermilk, room temperature Ensure room temperature for best results.
- 2 large eggs, room temperature Ensure room temperature for best results.
- 2 tablespoons red food coloring
- 1 teaspoon vanilla extract
- 1 teaspoon white vinegar
- 8 oz cream cheese, softened
- ½ cup unsalted butter, softened
- 4 cups powdered sugar
- 1 teaspoon vanilla extract
- 2 tablespoons milk, optional for consistency Use if a thinner consistency is desired.
Instructions
- Preheat the oven to 350°F (175°C) and line a 12-cup muffin tin with cupcake liners.
- In a large mixing bowl, sift together the flour, sugar, cocoa powder, baking soda, and salt. Set aside.
- In another bowl, mix together the vegetable oil, buttermilk, eggs, red food coloring, vanilla extract, and white vinegar until smooth.
- Gradually add the wet ingredients to the dry ingredients, mixing until just combined. Do not overmix.
- Divide the batter evenly among the cupcake liners, filling each about two-thirds full.
- Bake for 18-20 minutes, or until a toothpick inserted into the center comes out clean. Allow the cupcakes to cool in the pan for 5 minutes before transferring them to a cooling rack.
- While the cupcakes cool, make the cream cheese frosting by beating together the softened cream cheese and butter until light and fluffy.
- Gradually add the powdered sugar and mix until smooth. Stir in the vanilla extract and milk if a thinner consistency is desired.
- Once the cupcakes are completely cool, frost them with the cream cheese frosting using a piping bag or knife.
- For a decorative touch, sprinkle some edible glitter or red sprinkles on top of the frosting.
Leave a Reply