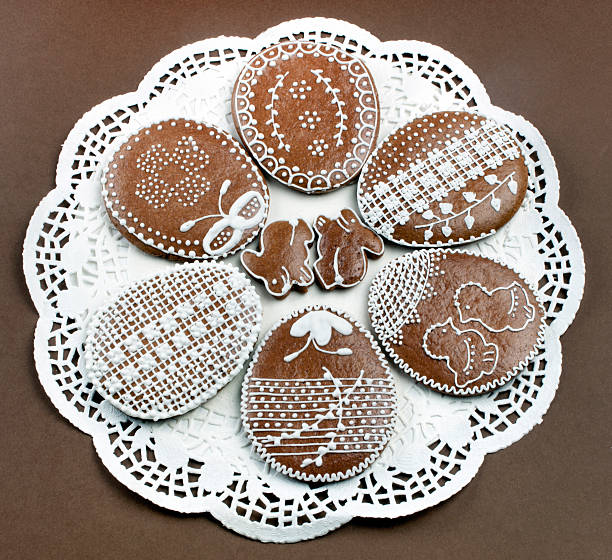
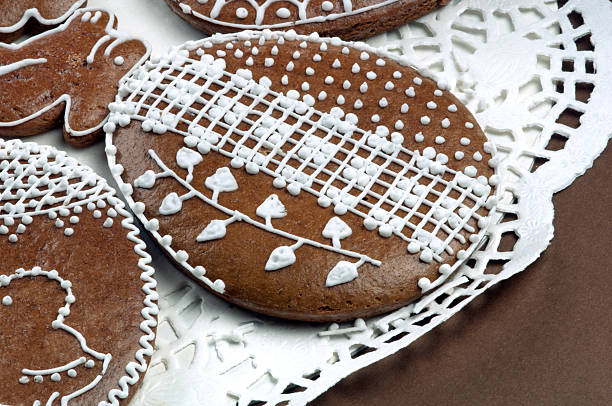
As spring shows up and the bright colors of Easter start to fill the air, one fun thing everybodys loves is baking Easter cutout cookies. These cute treats like bunnies, eggs and flowers, they not only hit the sweet spot but also make your party look more festive. And when the warm smell of cookies drifts around the house it feels super cozy.
Easter cookies are a big part of holiday customs, they stand for happiness, new starts and time spent together. Baking and decorating them can be a fun family project that sparks creativity and makes memories. Whether you go solo or with a group, rolling out dough, cutting shapes and adding colorful icing gets everyone excited. Swapping cookies with friends and family also shows the nice giving spirit of Easter.
In this post youll get the lowdown on Easter cutout cookies. We'll cover the old history behind these treats, list the stuff you need, and give you a simple step-by-step recipe so you can bake like a champ. Plus, youll find cool decorating ideas, tips to get kids in on the fun, and how to store or freeze your cookies. This will definately make your holiday tasty and bright. Let’s get started on this tasty adventure and make your Easter awesome with charming cookies!

History of Easter Cutout Cookies
People actualy started making cutout cookies way back in Europe during the Middle Ages. Bakers used cookie recipes for special days, and they cut em into shapes that meant something. Over time they tried all sorts of fancy designs for parties and festivities.
When Easter came around, cookies got new symbols to match the season. In some places, eggs on cookies mean fertility and new life, while in others, bunny shapes stand for rebirth. These designs reminds us that spring is here and nature is waking up after the cold winter.
As years went by, baking turned into a family tradition. Folks would meet up to roll dough, cut cookies and decorate them. What once was a solo task became a group activity filled with laughs and messes. Today, people all over the world bake Easter cutout cookies to celebrate heritage and bring everyone together.
Essential Ingredients for Easter Cutout Cookies
To make yummy Easter cutout cookies, you need these basic ingredients. They each do something important for the taste and texture.
- Flour: All-purpose flour gives the dough structure and keeps it from falling apart.
- Sugar: Granulated sugar sweetens things up. You can also use brown sugar for a little caramel flavor.
- Butter: Unsalted butter makes the cookies rich and tender. Make sure it’s softened first.
- Eggs: Eggs bind the dough and add moisture so it’s not dry.
- Flavorings: Vanilla or almond extract takes the taste up a notch with nice aroma.
For decorating, grab these extras:
- Royal icing: This icing dries hard, so it’s good for fine details.
- Food coloring: Add bright or pastel colors to make them pop.
- Sprinkles and edible glitter: Fun toppings for a festive look.

Step-by-Step Recipe for Easter Cutout Cookies
Ingredients
- 3 cups all-purpose flour
- 1 cup unsalted butter, softened
- 1 cup granulated sugar
- 2 large eggs
- 1 teaspoon vanilla extract
- ½ teaspoon salt
- Baking powder (optional)
Directions
- Make the Dough
- Cream the butter and sugar together until it’s light and fluffy, about 2–3 minutes. It shouldnt have big lumps.
- Add eggs one at a time, then stir in the vanilla extract.
- Gradually mix in flour, salt, and baking powder if you like. If dough is too sticky add a little more flour til it’s easy to handle. Wrap it in plastic and chill in the fridge for 1 hour.
- Roll and Cut Shapes
- Heat oven to 350°F (175°C). Lightly flour a surface and roll dough to about ¼ inch thick.
- Press cookie cutters into dough to get eggs, bunnies, flowers or what ever shape you like. Lay cookies on a parchment lined sheet.
- Bake
- Bake for 8–10 minutes or until edges are just starting to turn golden. Watch them close in the oven so they dont get too dark, wich can make them burn.
- Let them cool on the sheet for a few minutes then move to a wire rack to cool all the way.
- Decorate
- Mix egg whites and powdered sugar til thick and glossy for royal icing. Add color if you want.
- Use piping bags or a small spatula to apply icing and sprinkles. Have fun with it!
Tips for Perfect Cookies
- Chill dough so cookies keep their shape when baking.
- Avoid over-baking to keep them soft inside with a light golden edge.
- Store in airtight container at room temp, or freeze un-decorated cookies for up to 3 months.
Creative Decorating Ideas for Easter Cutout Cookies
Techniques
- Piping Bags: You get better control for small details with a piping bag.
- Fondant vs. Icing: Fondant makes a smooth cover, while icing is simpler to spread and shape.
Theme Ideas
- Pastel Colors: Soft pink, blue, yellow and green give a classic Easter look.
- Flower Patterns: Add petals or vines to celebrate spring blooms.
- Bunny Faces: Draw cute bunny ears, eyes and whiskers.
- Names or Initials: Personalize for each person at your party.
Tips for Making Easter Cutout Cookies with Kids
- Easy Steps: Let kids mix dough and press cutters. It makes them feel proud.
- Simple Shapes: Big, easy shapes are best for little hands.
- Creative Decorating: Give them different colors and let them go wild.
Storing and Freezing Easter Cutout Cookies
- Storage: Place completely cool cookies in an airtight container to keep them soft.
- Freezing: Freeze plain cookies in sealed bags for up to 3 months.
- Thawing: Let decorated cookies thaw at room temp, then eat within a few days for best taste.
Frequently Asked Questions (FAQs)
- Can I use different flavors? Yes, try lemon, coconut or peppermint extract for variety.
- What if I dont want royal icing? You can use a simple glaze from powdered sugar and milk, or melt chocolate to decorate.
- When else can I make cutout cookies? They are perfect for birthdays, Christmas, or any holiday you like.
- How long do cookies last? At room temp, about 1–2 weeks. In freezer up to 3 months.
Conclusion
Making Easter cutout cookies is a great way to add fun and flavor to your holiday. With this guide you have easy steps, tips and ideas to bake tasty cookies everyone will love.
Call to Action
Share your baking stories below, post pics of your creations on social media, and dont forget to subscribe for more yummy recipes!

easter cutout cookies
Equipment
- 1 mixing bowl
- 1 electric mixer or whisk
- 1 rolling pin
- various cookie cutters Easter shapes
- 2 baking sheets
- 1 parchment paper
- 1 cooling rack
Ingredients
- 2 ¾ cups all-purpose flour
- 1 teaspoon baking powder
- ½ teaspoon salt
- 1 cup unsalted butter Softened
- 1 ½ cups granulated sugar
- 1 large egg
- 1 tablespoon vanilla extract
- 1 teaspoon almond extract Optional
Instructions
- In a mixing bowl, whisk together the flour, baking powder, and salt. Set aside.
- In a large bowl, use an electric mixer or whisk to cream together the softened butter and sugar until light and fluffy.
- Add the egg, vanilla extract, and almond extract (if using) to the butter mixture, and mix until well combined.
- Gradually incorporate the flour mixture into the wet ingredients, mixing until a soft dough forms. Be careful not to overmix.
- Divide the dough in half, shape each half into a disc, and wrap in plastic wrap. Chill in the refrigerator for at least 1 hour or until firm.
- Preheat your oven to 350°F (175°C) and line baking sheets with parchment paper.
- On a floured surface, roll out one disc of dough to about ¼ inch thickness. Use cookie cutters to cut out desired shapes and place them on the prepared baking sheets.
- Bake in the preheated oven for 8-10 minutes, or until the edges are lightly golden. Allow the cookies to cool on the baking sheets for a few minutes before transferring them to a cooling rack to cool completely.
- Repeat with the remaining dough.


Leave a Reply