
These days, so many people talk about gluten free diets, its like everywhere you look. Some people ditch gluten cause of celiac disease, some cuz they feel sick when they eat it, and some just think its healthier. But dropping gluten can feel kinda limiting, especially if you miss that soft chewy bread. That’s why finding a roll thats tasty and fluffy without gluten is a big deal.
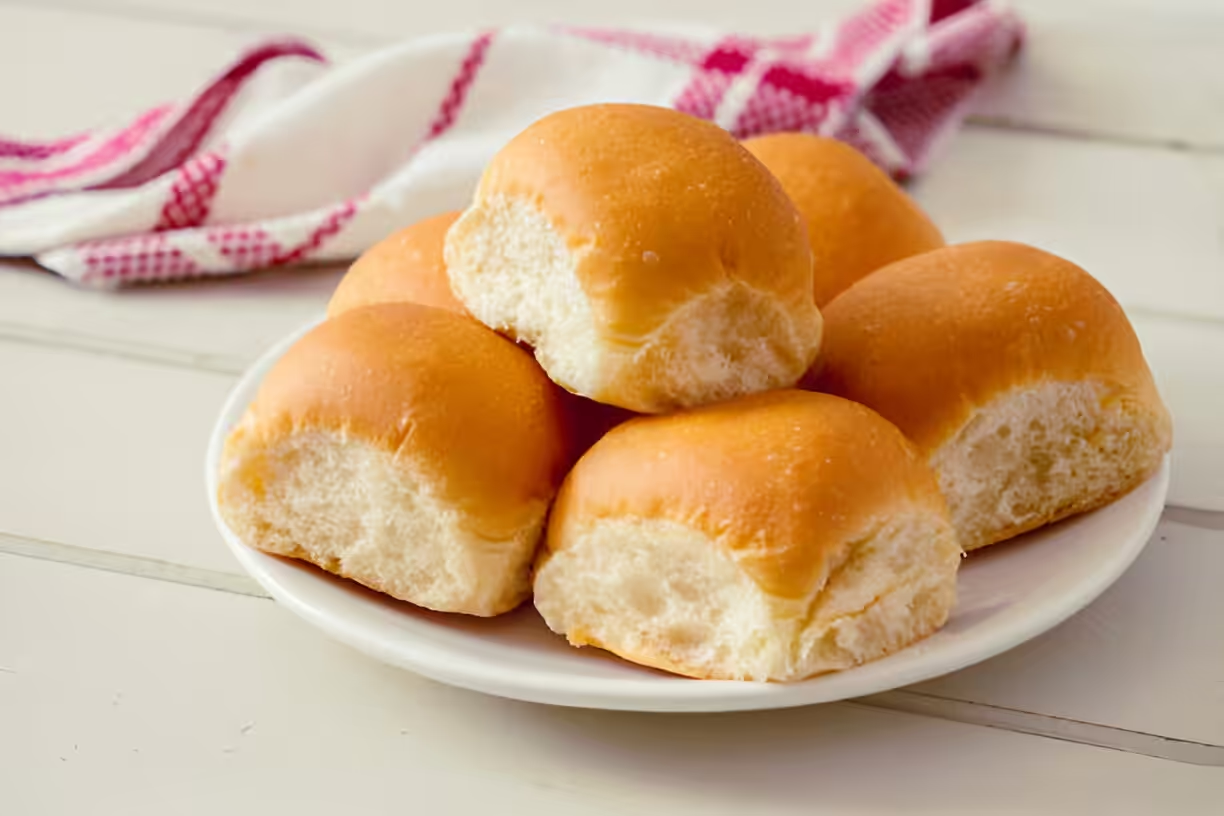
One thing a lot of folks want is a good dinner roll, cause rolls go with soups, salads, and big meals. Gluten free dinner rolls let you still have something warm and comforting, even if you can’t eat regular wheat rolls. With the right mix of gluten free flours and a few tricks, you can make rolls almost as light and soft as the ones full of gluten.
In this article, you’ll learn about different gluten free flours, why they’re good for you, and the science tricks to make perfect rolls. Whether you’re new to baking or you make bread all the time, this guide will help you bake rolls everyone will gobble up. Let’s get started and wow your family and friends with homemade gluten free dinner rolls!
Understanding Gluten-Free Flours
When you start baking without gluten, its super important to get to know the flours you can use. Each one tastes different, feels different, and has different nutrients. Here are some popular ones you might try:
- Almond Flour: Made from ground almonds. Its full of protein and healthy fats. Gives baked goods a moist texture and a slight nutty taste.
- Coconut Flour: Comes from dried coconut meat. It soaks up a lot of liquid so you often mix it with other flours. Adds a little coconut flavor.
- Rice Flour: A go-to in gluten free baking. Its pretty neutral in taste and helps create light, airy rolls. Lots of gf blends start with rice flour.
- Tapioca Flour: Made from cassava root. Gives chewiness and crisp crust. You usually mix it with other flours to get the right texture.
Mixing a few of these flours usually works best. For dinner rolls, try a blend with rice flour as the base and a bit of almond or tapioca flour to balance flavor and texture. Always look for flours labeled certified gluten free so you know they’re safe.
Health Benefits of Gluten-Free Dinner Rolls
Going gluten free can help if you have celiac disease or gluten sensitivity, but even people without those issues might like some benefits. Gluten free dinner rolls can be made with whole foods like fruits, veggies, and grains that dont have gluten naturally, so you get more vitamins, minerals, and fiber which is good for digestion.
For folks with celiac or gluten sensitivity, these rolls dont have the proteins that cause inflammation, so they can enjoy bread without feeling awful. And lots of gluten free flours have a lower glycemic index, which might help keep blood sugar steadier than white wheat flour.
The Science Behind Gluten-Free Baking
Gluten is what makes wheat dough stretchy and helps it rise. Without it, gluten free dough is more fragile and wont trap gas from yeast as well. That’s where binders like xanthan gum or psyllium husk come in. They act like gluten, giving dough some stretch and structure.
Xanthan gum is a fermented sugar that thickens dough and gives it a bread-like feel. Psyllium husk is a fiber that keeps moisture in, making rolls soft. Knowing how much of these to use helps you bake gluten free rolls that aren’t dense or dry.
Step-by-Step Recipe for Gluten-Free Dinner Rolls
Ingredients
- 2 cups gluten free all-purpose flour
- 1 cup warm water
- 3 tablespoon olive oil
- 2 tablespoon honey or maple syrup
- 1 packet active dry yeast
- ½ teaspoon salt
- ½ teaspoon xanthan gum or psyllium husk
Directions
Step 1: Activating the yeast
Stir warm water and honey or maple syrup in a small bowl. Sprinkle yeast on top and wait 5-10 minutes until it looks foamy. If it doesn’t foam, the yeast might be dead.
Step 2: Mixing the dry ingredients
In a big bowl, whisk together gluten free flour, salt, and xanthan gum or psyllium husk. Get rid of any lumps so every part of the dough bakes the same.
Step 3: Combining wet and dry ingredients
Pour the foamy yeast mix and olive oil into the dry mix. Stir with a spatula or wooden spoon until it makes a thick, slightly sticky dough. It wont be stretchy like normal dough, thats ok.
Step 4: Letting the dough rise
Cover the bowl with a kitchen towel or plastic wrap. Put it somewhere warm without drafts. Let it rise for 30-45 minutes, or until you see it puff up. This step really helps flavor.
Step 5: Shaping rolls and second rise
Dust your counter with more gluten free flour. Divide dough into 8 pieces and roll into balls. Place them on a baking sheet lined with parchment, leave some space. Cover and let them rise 20-30 more minutes.
Step 6: Baking
Preheat oven to 375°F (190°C). Take the cover off and bake rolls 20-25 minutes until golden and hollow-sounding when tapped. A toothpick should come out clean.
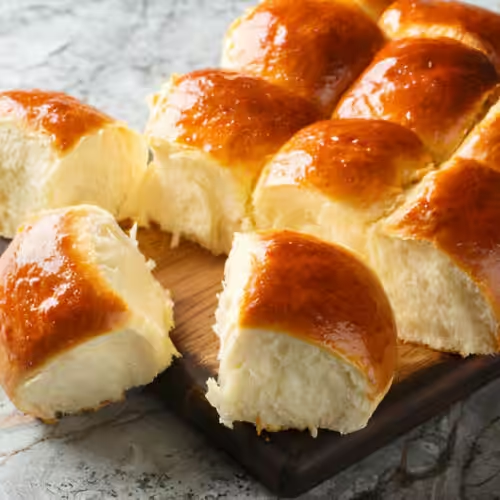
Step 7: Serving suggestions
Let rolls cool a bit on a rack. They taste best warm, with butter, or along soups and salads. You can also spread hummus or garlic herb butter on them.
Tips for Success
Make sure ingredients are fresh cause stale stuff can ruin your rolls. Measure flour by fluffing it then scooping, dont pack it. Gluten free dough acts different, so be patient and follow directions closely.
Creative Variations of Gluten-Free Dinner Rolls
Want to mix it up? Try these ideas:
- Cheese-stuffed rolls: Put a cube of cheese in each ball before shaping for a gooey center.
- Herb-infused rolls: Stir chopped rosemary or thyme into the dough for extra flavor.
- Sweet cinnamon rolls: Add cinnamon and sugar, swirl it in, and bake for a dessert roll.
Storing and Reheating Gluten-Free Dinner Rolls
Cool rolls completely then put in an airtight container. Room temp is fine for a couple days, or fridge up to a week. For long storage, freeze them: wrap each in plastic wrap, put in a freezer bag. To reheat, thaw and bake at 350°F (175°C) for 10-15 minutes until warm.
Frequently Asked Questions (FAQs)
Can I use regular flour instead of gluten-free flour?
No, regular flour has gluten which makes bread rise. You need gluten free blends for these rolls.
What can I substitute for xanthan gum?
You can use psyllium husk instead. Both help bind the dough.
How can I make these dinner rolls dairy-free?
Use dairy-free butter or just more olive oil. Everything else is already dairy-free.
Why did my gluten-free rolls not rise?
Maybe the yeast was old, or measurements were off, or you didnt let them rise long enough. Check your yeast and timing.
Can I freeze gluten-free dinner rolls?
Yes, see the storing section. Just wrap them well so they dont get freezer burn.
Conclusion
Going gluten-free doesnt mean you gotta give up tasty rolls. With good ingredients and a few tricks, you can bake soft, fluffy dinner rolls that everyone will love.
Call to Action
Share your own roll experiments on social media, and don’t forget to subscribe for more gluten-free recipes and tips!
Gluten-Free Dinner Rolls
Equipment
- 1 mixing bowl
- 1 whisk
- 1 rubber spatula
- 1 baking sheet
- 1 parchment paper
- 1 measuring cups and spoons
- 1 oven
Ingredients
- 2 cups gluten-free all-purpose flour
- ¼ cup almond flour
- ¼ cup tapioca flour
- 1 tablespoon active dry yeast
- 1 teaspoon sugar
- 1 teaspoon salt
- 1 cup warm water 110°F/43°C
- ¼ cup olive oil
- 2 large eggs
- 1 teaspoon apple cider vinegar
Instructions
- Preheat your oven to 375°F (190°C). Line a baking sheet with parchment paper and set it aside.
- In a mixing bowl, combine the warm water, sugar, and active dry yeast. Let it sit for about 5-10 minutes until it becomes frothy.
- In another bowl, whisk together the gluten-free all-purpose flour, almond flour, tapioca flour, and salt.
- Once the yeast mixture is frothy, add the olive oil, eggs, and apple cider vinegar. Mix well.
- Gradually add the flour mixture to the wet ingredients. Stir with a rubber spatula until a sticky dough forms.
- With your hands slightly moistened, divide the dough into 12 equal portions and shape them into rolls. Place the rolls on the prepared baking sheet, leaving some space in between.
- Cover the rolls with a clean kitchen towel and let them rise in a warm place for about 20 minutes.
- Bake the rolls in the preheated oven for 25 minutes or until they are golden brown and sound hollow when tapped on the bottom.
- Remove from the oven and let them cool on a wire rack.
- For added flavor, you can brush the rolls with melted butter or garlic butter as soon as they come out of the oven.

Leave a Reply