
That first hiss from the cooker tells you something good is happening. You hear that valve hiss and instantly you feel like dinner or dessert is on its way. It’s kinda like the soundtrack of kitchen wins you look forward to all day.
Once that hiss starts, you know the cooker’s locking in flavors and heat real good. The steam cues come together to make everything inside soft and tasty all the way through, no spots left dry or tough. It’s cool how that sealed heat does the work while you just wait.
You might remember when you used to think baking or cooking sweets took forever. But now with the pressure cooker’s quick release feature, you get that sweet fix faster than you’d expect. Plus, the natural release lets things settle perfectly without rushing. You’re about to see how these homemade gluten-free & vegan Twix bars come alive with this method.
Why Your Cooker Beats Every Other Pot
- Traps heat and moisture better than any regular pot you got.
- Makes your shortbread layer dense and crumbly just right with its broth depth steam effect.
- Takes half the time to get that perfect caramel goo.
- Let’s you set the chocolate layer flawlessly without melting the caramel underneath.
- Steam cues inside keep everything moist while baking, never dry.
- Quick release helps you avoid overcooking delicate layers like the nut butter caramel.
- Natural release makes the texture come out tender and not rushed or broken.
Everything You Need Lined Up
- ⅔ cup (85g) coconut flour
- 3 tablespoons (63g) pure maple syrup
- ⅓ cup (66g) coconut oil, solid (refined for no strong coconut flavor)
- ½ cup (128g) creamy almond butter (cashew, sunflower seed butter, or tahini works too)
- ⅓ cup (111g) pure maple syrup
- ⅓ cup (66g) coconut oil, melted (use refined again)
- 1 teaspoon vanilla extract
- ¼ teaspoon kosher salt
- ¼ cup (50g) coconut oil, melted (refined)
- ¼ cup (21g) cocoa powder, plus 2 tablespoons (42g) maple syrup
Gotta make sure you have that parchment paper for lining your pan too. It’s gonna help pop those bars out easily after chilling. This lineup is simple but packs a punch for gluten-free and vegan textures.
How It All Comes Together Step by Step
First, grab an 8x8-inch baking pan and line it with parchment paper. You wanna set yourself up to get those bars out clean, no mess.
Next, in a mixing bowl, combine the coconut flour, 3 tablespoons maple syrup, and ⅓ cup solid coconut oil. Stir 'til the dough forms a kind of shortbread texture. Don’t stress if it’s a little crumbly, that’s normal.
Press that dough evenly into your pan’s bottom to make the shortbread layer. Pop it in the freezer to firm up for 10 minutes. This step helps the layers not mix too much later.
While that chills, mix creamy almond butter with the ⅓ cup maple syrup, melted coconut oil, vanilla extract, and salt until smooth. This is your caramel-ish filling—smooth and dreamy.
Pour this caramel mix carefully over your chilled shortbread. Spread it out evenly so every bar gets a good gooey layer. Put it back in the freezer for about 15–20 minutes 'til it’s set.
Last step for layers is the chocolate top. Whisk melted coconut oil with cocoa powder and 2 tablespoons maple syrup until silky. Pour the chocolate over the caramel layer and smooth it out. Freeze again for 10 minutes or 'til it’s totally set.
When it’s firm, yank out your pan from the freezer, lift the parchment to pop it out, and slice your bars. Keep these babies stored in the fridge or freezer till you’re ready to grab one.
Easy Tweaks That Make Life Simple
- Swap almond butter with sunflower seed butter or tahini for a nut-free version. Works just as good and gives a nice twist on flavors.
- Use maple syrup drizzle instead of mixing it in the dough for a fudgier shortbread layer. Just drizzle just before the caramel layer.
- If you’re in a rush, skip the freezer and chill layers in the fridge but expect it to take about twice as long to set.
These tweaks keep things easy and you’ll still get that signature crunch-meets-chewy vibe you’re hunting for with these bars.
When You Finally Get to Eat
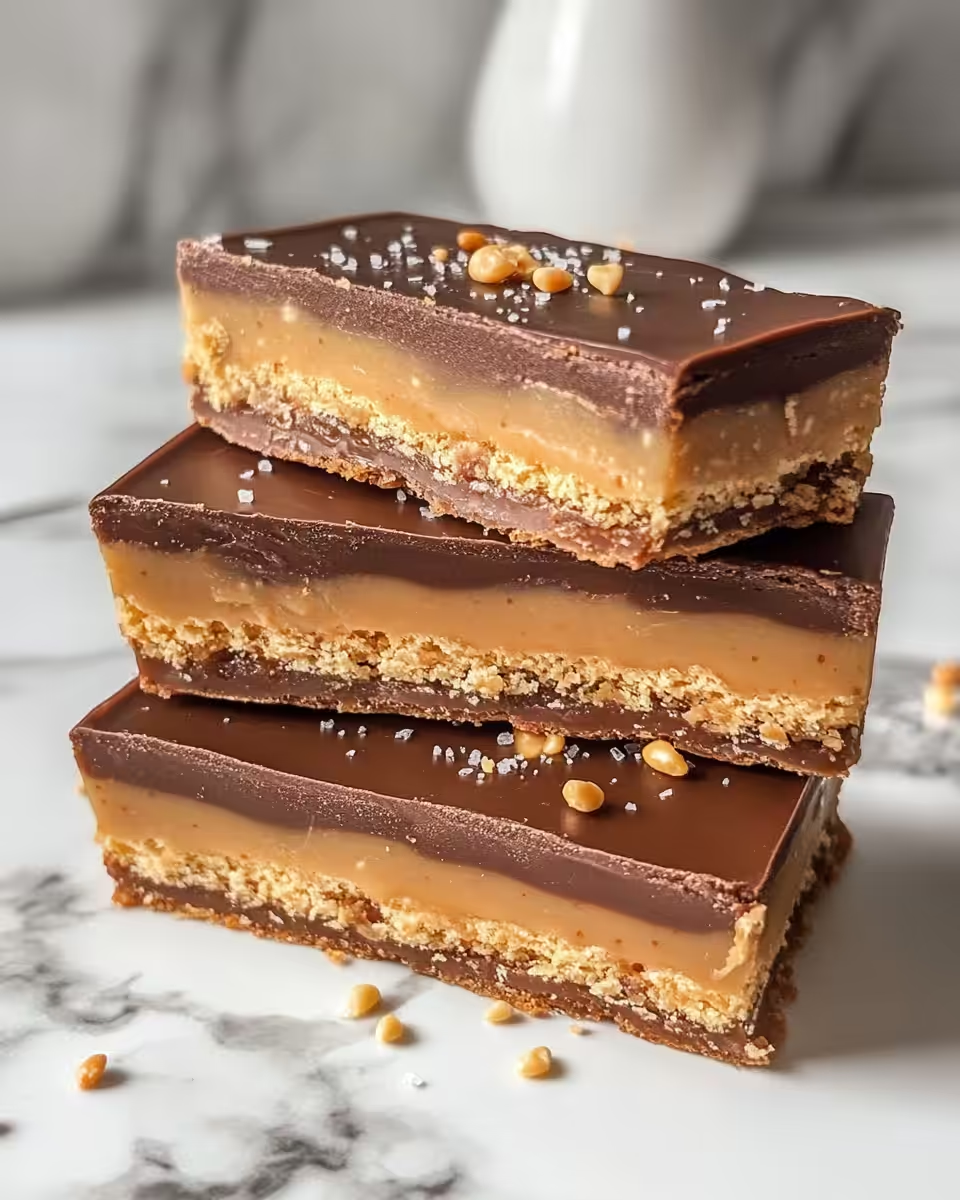
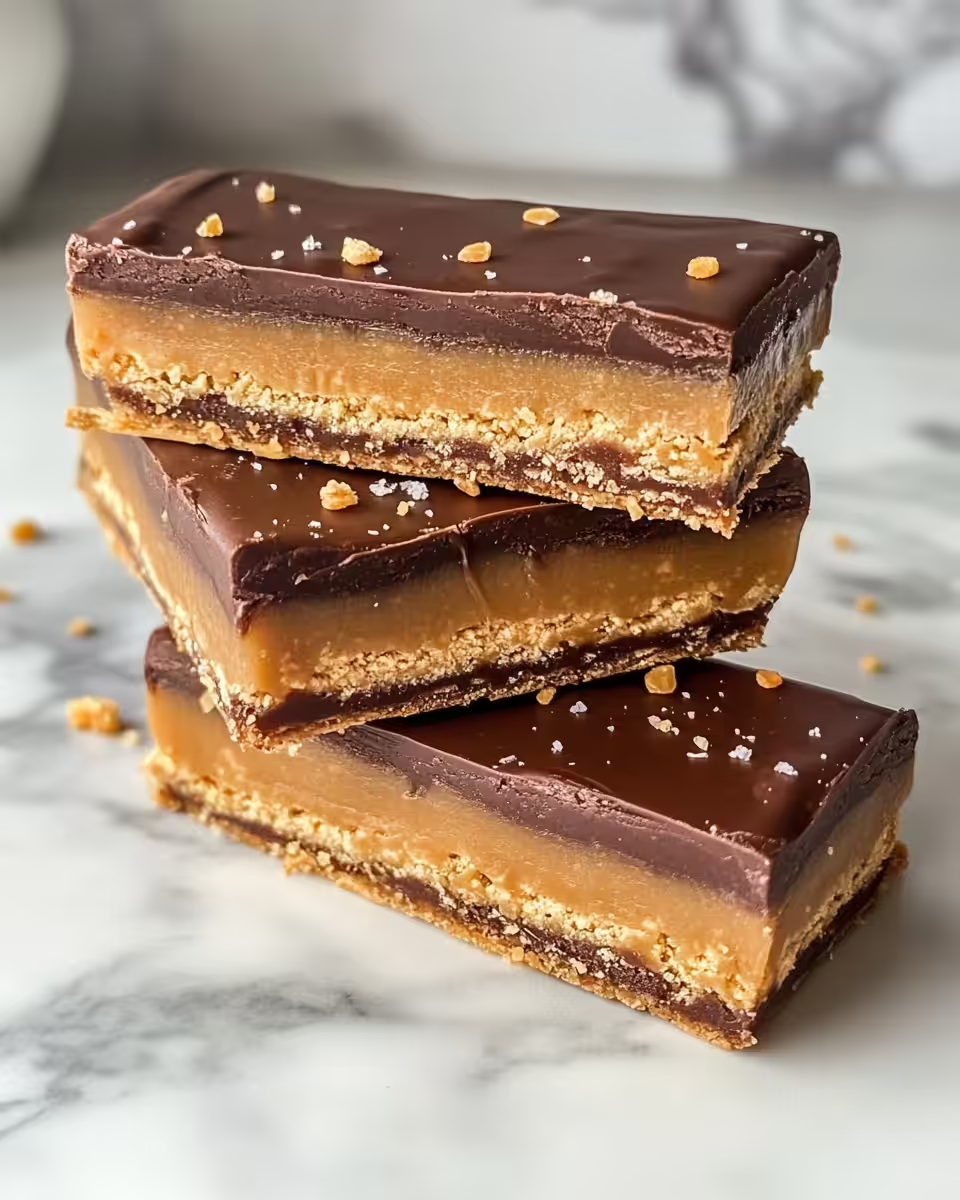
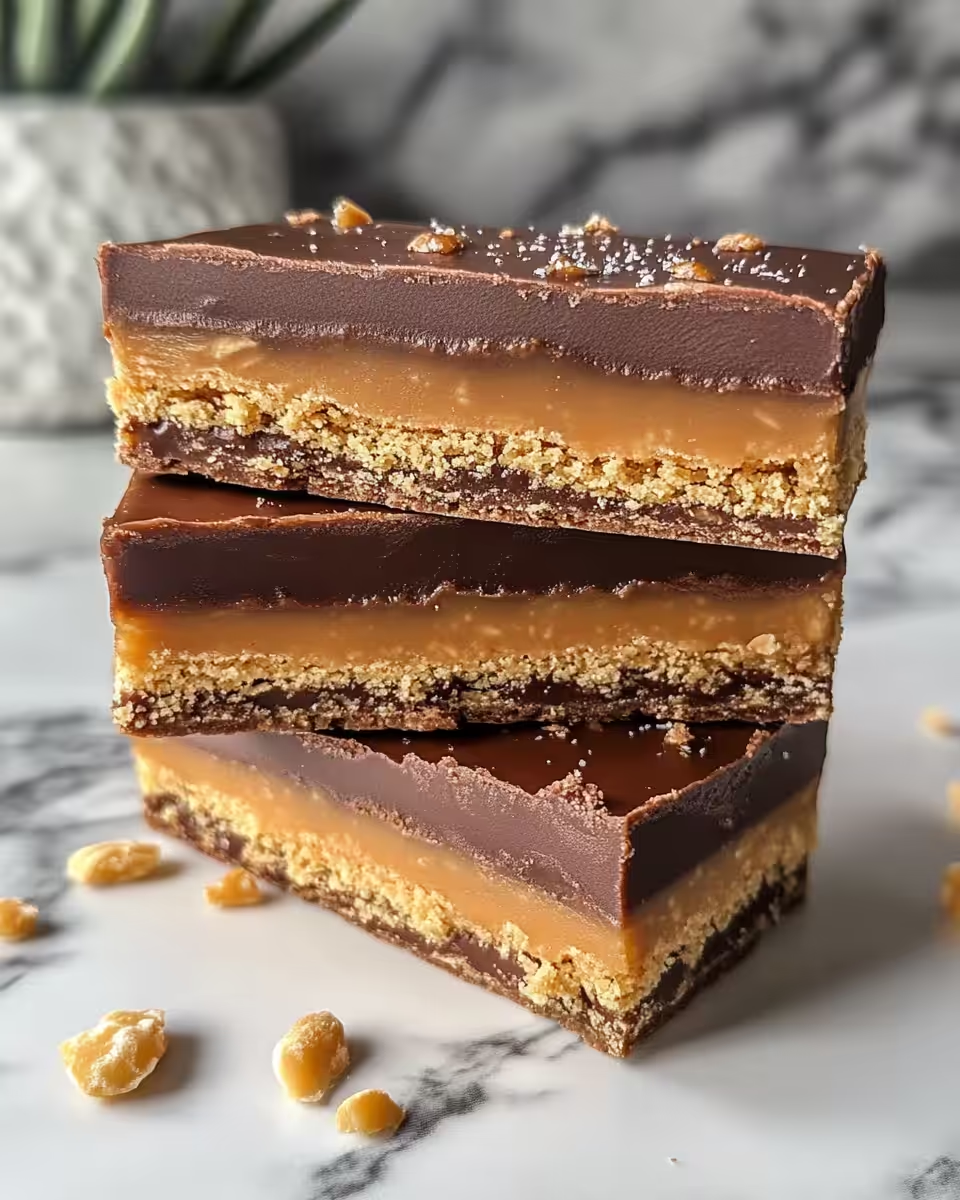
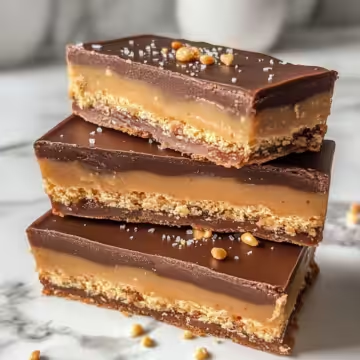
You bite into that first bar and the crisp shortbread presses a nice contrast to the creamy caramel layer. The sweetness is gentle, thanks to the pure maple syrup, not too in your face.
The chocolate topping melts slowly in your mouth, rich but not heavy, dunking the caramel in cocoa goodness. You feel that velvety, slightly salty kick from the flaky sea salt, dang it really ties it together.
It’s kinda like the version you remember but better with no gluten and no dairy slowing you down. These bars are perfect little treats. You’re gonna wanna make some every week once you taste 'em.
Your Leftover Strategy Guide
- Store them in an airtight container in the fridge to keep the layers firm and fresh for up to a week.
- If you want 'em longer, stash the bars in the freezer wrapped tightly and they’ll hold up well for a month or more.
- To thaw, just set them out on the counter for 10 minutes or so or pop 'em in the fridge overnight.
- If you need quick snacks, keep a small batch on the counter covered with a cake dome and eat within 2 days to keep that shortbread crisp.
Remember to watch for any moisture buildup, especially if you're freezer-storing. You wanna keep the bars dry and not soggy to hold that perfect crunch.
What People Always Ask Me
- Q: Can I use peanut butter instead of almond butter?
A: Totally, peanut butter works well but it does bring a stronger taste, so just keep that in mind. - Q: Do I really need to use refined coconut oil?
A: Refined is best if you want a neutral flavor. If you love coconut taste, unrefined works too but it might make the bars smell more coconutty. - Q: Can I make these without a pressure cooker?
A: You can try, but the cooker really speeds up setting the layers and keeps texture better. Oven baking or fridge chilling takes longer and varies results. - Q: What’s the deal with natural release and quick release?
A: Quick release stops cooking fast by opening the valve hiss, great for delicate stuff like caramel. Natural release lets pressure drop gradually for tender results but takes longer. - Q: How do I know when the caramel layer is set enough?
A: You’ll see it firm up and not jiggle much when you lightly tap the pan. Freezing helps lock it solid before adding chocolate. - Q: Can I use other sweeteners besides maple syrup?
A: You can, like agave or brown rice syrup, but maple syrup gives that clean sweet flavor that’s hard to beat.
Homemade Gluten-Free & Vegan Twix Bars
Equipment
- 1 Mixing bowl
- 1 8x8-inch baking pan
Ingredients
Ingredients
- ⅔ cup coconut flour (85g)
- 3 tablespoons pure maple syrup (63g) for shortbread
- ⅓ cup coconut oil (66g), solid, refined
- ½ cup creamy almond butter (128g), or substitute cashew, sunflower seed butter, or tahini
- ⅓ cup pure maple syrup (111g) for caramel
- ⅓ cup coconut oil (66g), melted, refined
- 1 teaspoon vanilla extract
- ¼ teaspoon kosher salt
- ¼ cup coconut oil (50g), melted, for chocolate layer
- ¼ cup cocoa powder (21g)
- 2 tablespoons maple syrup (42g), for chocolate topping
- 1 parchment paper for lining the pan
Instructions
Instructions
- Line an 8x8-inch baking pan with parchment paper.
- In a mixing bowl, stir together coconut flour, 3 tablespoons maple syrup, and ⅓ cup solid coconut oil until a shortbread-like dough forms.
- Press the dough evenly into the bottom of the lined pan. Freeze for 10 minutes.
- Mix almond butter, ⅓ cup maple syrup, ⅓ cup melted coconut oil, vanilla extract, and salt until smooth to create the caramel layer.
- Pour caramel layer over the chilled shortbread and spread evenly. Freeze 15–20 minutes until set.
- Whisk melted coconut oil, cocoa powder, and 2 tablespoons maple syrup until smooth for the chocolate layer.
- Pour chocolate layer over the set caramel and smooth. Freeze again for 10 minutes until firm.
- Remove bars from pan using parchment. Slice and store in fridge or freezer.
Leave a Reply