
The pressure builds and you start counting down minutes until you eat. You know that feeling when the valve hiss kicks in and you gotta get ready for that quick release. That steam cues pop off and you try not to get distracted cause dinner's almost done.
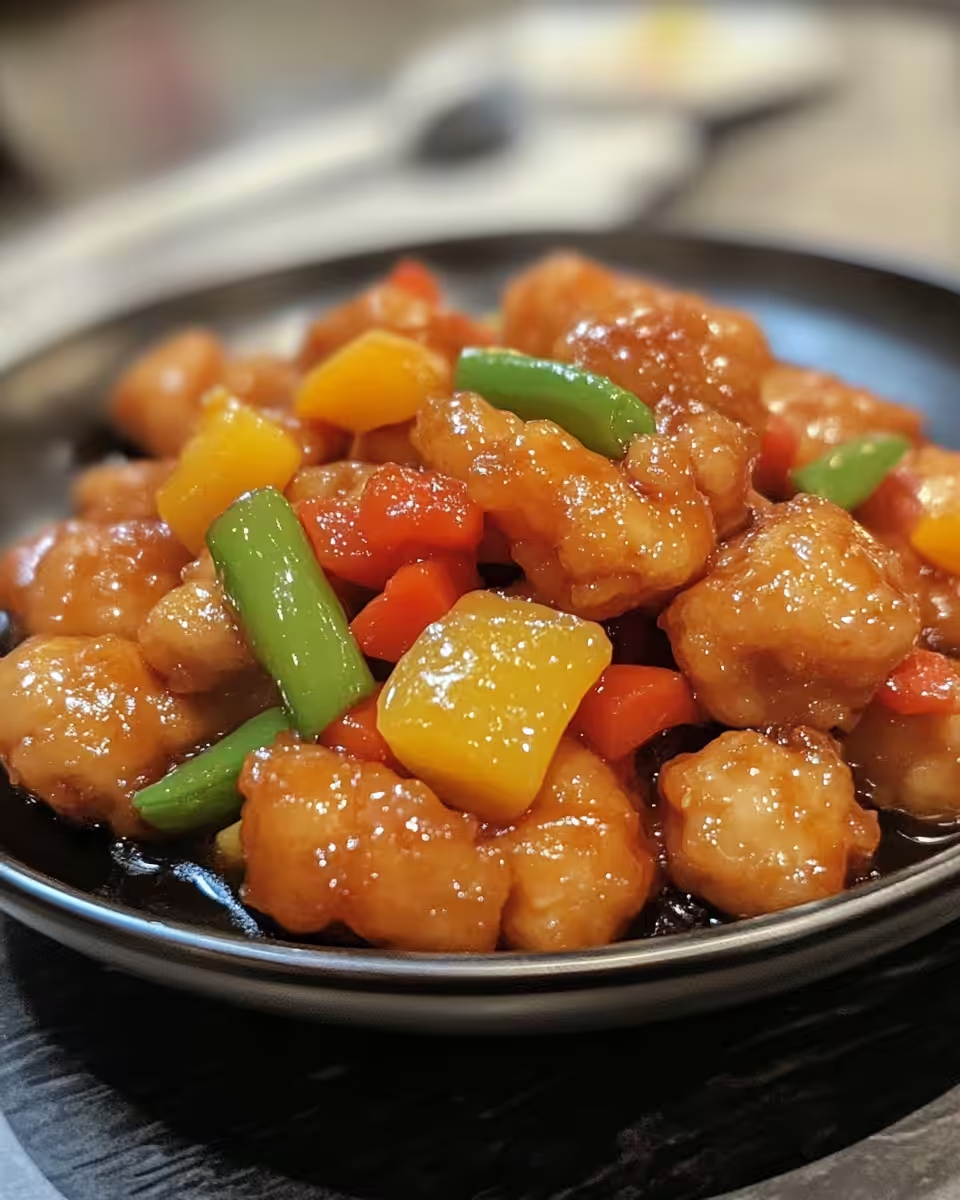
When you crack open your pressure cooker, you sense that broth depth and those sweet and tangy smells flooding your kitchen. It hits you right in the face and you recall why homemade beats takeout every dang time. The chicken pieces are cooked to tender perfection but still got a little crisp, just the way ya like it.
You notice how simple it was to make, all thanks to that natural release method that lets flavors mingle and settles the whole dish. It’s kinda like a little victory every time you hear that final hiss and know it’s go time. Sweet and sour chicken has never felt this good and you’re all ready to dig in.
The Real Reasons You Will Love This Method
- You get perfectly tender chicken with a crispy outside cuz of the quick cornstarch dredge and skillet browning.
- The pressure cooker locks in all those juicy flavors and infuses the sauce deep into the chicken.
- The sauce combines sugar, ketchup, vinegar, soy sauce, and garlic powder for that classic tangy punch.
- Using natural release helps the flavors settle and keep the chicken moist and tender.
- Cooking in batches lets you get a nice crisp crust on your chicken pieces without overcrowding.
- It’s a hands-off hour in the oven after you brown the chicken so you can chill or prep your sides.
Your Simple Ingredient Checklist
- 2 ½ lbs boneless skinless chicken breasts, cut into bite-sized chunks and seasoned with salt and pepper.
- 1 cup cornstarch for dredging that gives chicken the perfect crispy coat.
- 3 eggs beaten lightly to help the coating stick nice and even.
- ¼ cup vegetable oil for browning the chicken in your skillet over medium-high heat.
- 1 cup sugar to balance sweetness just right in your sauce.
- 6 tablespoons ketchup bringing that thick, tangy base to your sauce mix.
- ¾ cup apple cider vinegar adding the sour zing that makes everything pop.
- 1 ½ tablespoons soy sauce for a salty depth that’s kinda savory and comforting.
- 1 ½ teaspoons garlic powder rounding out the flavor with just the right hint of garlic.
How It All Comes Together Step by Step
Step 1. Preheat your oven to 325 degrees Fahrenheit so it’s ready when your chicken hits the baking dish.
Step 2. Cut your chicken into bite-sized chunks and season with salt and pepper till every piece feels right.
Step 3. In one shallow bowl pop in the cornstarch, in another lightly beaten eggs. You’ll dredge the chicken first in cornstarch then dip in the eggs—yeah, kinda backwards but trust me it works real good.
Step 4. Heat up that vegetable oil in a skillet over medium-high heat. Once sizzling, add the coated chicken pieces in batches so they brown on all sides without crowding.
Step 5. Brown your chicken, don’t worry about cooking through, you just want crispy outsides so get ’em good and golden. Transfer the browned pieces into a 9 by 13-inch baking dish after each batch.
Step 6. Whisk together sugar, ketchup, apple cider vinegar, soy sauce, and garlic powder in a bowl. Pour this tangy mixture all over your browned chicken in the dish.
Step 7. Pop the whole thing in the oven and bake uncovered for one hour. Every 15 minutes, stir that chicken around so all the sauce glazes every piece evenly. Then get ready for the quick release and enjoy.
Smart Shortcuts for Busy Days
- Prep your chicken chunks and season them the night before so you're ready to go when it's time to cook.
- Use pre-beaten eggs from a carton if you’re running tight on time; saves cracking and whisking.
- Make the sauce ahead and keep it in the fridge so all you gotta do is pour it over browned chicken and bake.
When You Finally Get to Eat
You dig your fork in and that first bite is just wow. The crispy coating still crunches slightly but the chicken inside is juicy and melts in your mouth. That sweet and sour sauce clings to every crumb and you catch that deep tang mixed with a little sweet zing right away.
It smells all cozy and kitcheny, like you’ve been transported to your favorite takeout spot but this time it’s all yours. The sauce isn’t too runny and not too thick, just the right balance that coats your rice and chicken perfectly.
With each bite, you notice the garlic powder sneaking its way into the mix, adding that subtle warm depth. You feel satisfied and kinda proud that you made this whole dang thing yourself with your pressure cooker as the hero.
Making It Last All Week Long
- Store leftovers in airtight containers in the fridge for up to 4 days. Just reheat gently to keep the chicken tender.
- You can freeze portions in zip-top bags or containers for up to 3 months. Thaw overnight in the fridge before reheating.
- Pack leftover sweet and sour chicken into meal prep containers with rice and steamed veggies for grab-and-go lunches.
- If the sauce thickens too much when stored, add a splash of water or broth and warm over low heat to bring it back to saucy goodness.
The FAQ Section You Actually Need
- Q: Can I use chicken thighs instead of breasts?
A: Totally, thighs work great and stay juicy. Just watch the cooking times and maybe shorten the bake a bit. - Q: Do I have to brown the chicken?
A: It’s what gives you that crispy outside y’all want. Skipping it means softer chicken without that nice texture. - Q: What if I don’t have cornstarch?
A: You can try all-purpose flour but cornstarch is better for that crisp crisp crust. - Q: How do I know when to do the quick release?
A: Once the cooking time is up and you see the valve hiss release, carefully turn the valve to quick release the steam and open it up. - Q: Can I cook the chicken all in the pressure cooker instead of oven baking?
A: This recipe needs that oven time to keep the chicken crispy and develop sauce flavor. Using the pressure cooker alone makes the chicken soft and misses some crust. - Q: Can I double the recipe?
A: You can but make sure not to overcrowd the skillet while browning. Cook in batches and use a bigger baking dish for even sauce coverage.
Sweet and Sour Chicken RecipeDeborah
Equipment
- 1 Mixing bowl for whisking sauce
- 1 Skillet for browning chicken
- 1 Baking dish 9 by 13 inch
Ingredients
Main ingredients
- 2 ½ lbs Boneless skinless chicken breasts cut into bite-sized chunks and seasoned with salt and pepper
- 1 cup Cornstarch for dredging
- 3 Eggs lightly beaten
- ¼ cup Vegetable oil for browning
- 1 cup Sugar
- 6 tablespoons Ketchup
- ¾ cup Apple cider vinegar
- 1 ½ tablespoons Soy sauce
- 1 ½ teaspoons Garlic powder
Instructions
Instructions
- Preheat your oven to 325 degrees Fahrenheit so it’s ready when your chicken hits the baking dish.
- Cut your chicken into bite-sized chunks and season with salt and pepper till every piece feels right.
- In one shallow bowl pop in the cornstarch, in another lightly beaten eggs. Dredge the chicken first in cornstarch then dip in the eggs.
- Heat up the vegetable oil in a skillet over medium-high heat and add the coated chicken pieces in batches to brown on all sides.
- Transfer browned chicken to a 9 by 13-inch baking dish after each batch.
- Whisk together sugar, ketchup, apple cider vinegar, soy sauce, and garlic powder in a bowl.
- Pour sauce mixture evenly over chicken in the dish.
- Bake uncovered at 325°F for 1 hour.
- Every 15 minutes, stir the chicken so the sauce coats each piece evenly and caramelizes.
- Once baked, serve hot over rice or side of choice.
- Enjoy the crispy, tangy, sweet perfection of your sweet and sour chicken.


Leave a Reply