
That first hiss from the cooker tells you something good is happening. You notice how that valve hiss kinda fills the kitchen with a promise that dinner won’t take forever. It’s like the start of a little countdown where you know the flavors are about to get right into the chicken, making everything tender and juicy.
When the pressure build nails that perfect seal, it’s almost comforting. You sit back a bit, knowin the slow release later will just finish things off gently. It’s better than waiting forever like some slow simmer situation, but somehow still feels like the flavors had time to soak deep.
And that broth depth, oh you can feel it even before you crack the lid. The smell kinda teases and then when you peek, it’s like the chicken just falls apart with a gentle tender pull. You've gotta trust me, this method changes the game for quick coconut curry chicken.
The Truth About Fast Tender Results
- You don’t need hours to get tender chicken that soaks up curry flavors real good.
- Pressure build in your cooker forces heat and steam to get deep into the meat fast.
- Slow release lets things chill out gently so the texture stays juicy, not rubbery.
- Using full-fat coconut milk helps add richness and prevents drying out under pressure.
- Quick sear before cooking locks in some browning that brings out layered flavors.
What Goes Into the Pot Today
- 1 lb boneless skinless chicken breast or thighs cut into 1-inch pieces
- 3 cloves garlic, minced till it’s fine and fragrant
- 2 tablespoons finely minced fresh ginger
- 2 teaspoons ground coriander for a touch of earthiness
- 2 teaspoons yellow curry powder for that warm spice
- 3 tablespoons red curry paste, adjust for your spice mood
- 1 tablespoon fresh lime juice to brighten things up at the end
- 3 tablespoons coconut oil, split into 2 and 1 for searing and sautéing
- Plus extras: 1 large red bell pepper sliced, ½ medium yellow onion, 1-2 tablespoons brown sugar, 2 teaspoons fish sauce (optional), 1 can full-fat coconut milk, quarter cup chopped cilantro or basil, fine sea salt and pepper to taste
Your Complete Cooking Timeline
Step 1: Heat 2 tablespoons of coconut oil in a large skillet over medium-high heat. Toss in your chicken pieces and brown them good on all sides, you want that color before pressure cooking. Once they look almost done, remove chicken and set aside.
Step 2: In the same skillet, add the last tablespoon of coconut oil. Throw in the minced garlic and ginger, sauté for about 1-2 minutes till they smell amazing and you start to feel that curry vibe coming.
Step 3: Now stir in ground coriander, yellow curry powder, and red curry paste. Keep cooking for another 1-2 minutes so the spices bloom and all those flavors come alive right in your pan.
Step 4: Add the sliced red bell pepper now, cook for 3 to 4 minutes till they soften up just a bit but still hold their shape. This adds sweetness and crunch to balance the curry’s heat.
Step 5: Pour in your full-fat coconut milk and bring the mix to a light simmer. Next, scoop back in the browned chicken pieces and stir everything together so the sauce starts thickening gently.
Step 6: Transfer this whole mixture to the pressure cooker pot if not already there. Lock the lid, set your cooker to pressure cook for about 8 to 10 minutes. When done, do a slow release so the flavors keep settling in. Once you open it, stir in lime juice and adjust seasoning with sea salt and freshly cracked pepper. Then serve hot over basmati rice or with naan bread, topping with fresh cilantro or basil and optional nuts for a crunch.
Time Savers That Actually Work
- Prep ingredients the night before so you just dump it in the cooker later.
- Use pre-minced garlic and ginger if you don’t feel like chopping fresh every time.
- Grab pre-sliced bell peppers from the market to skip slicing.
- Swap cooking skillet for your pressure cooker’s sauté mode to save a dish or two.
- Use quick-cook basmati rice packets to have perfect rice ready right when curry’s done.
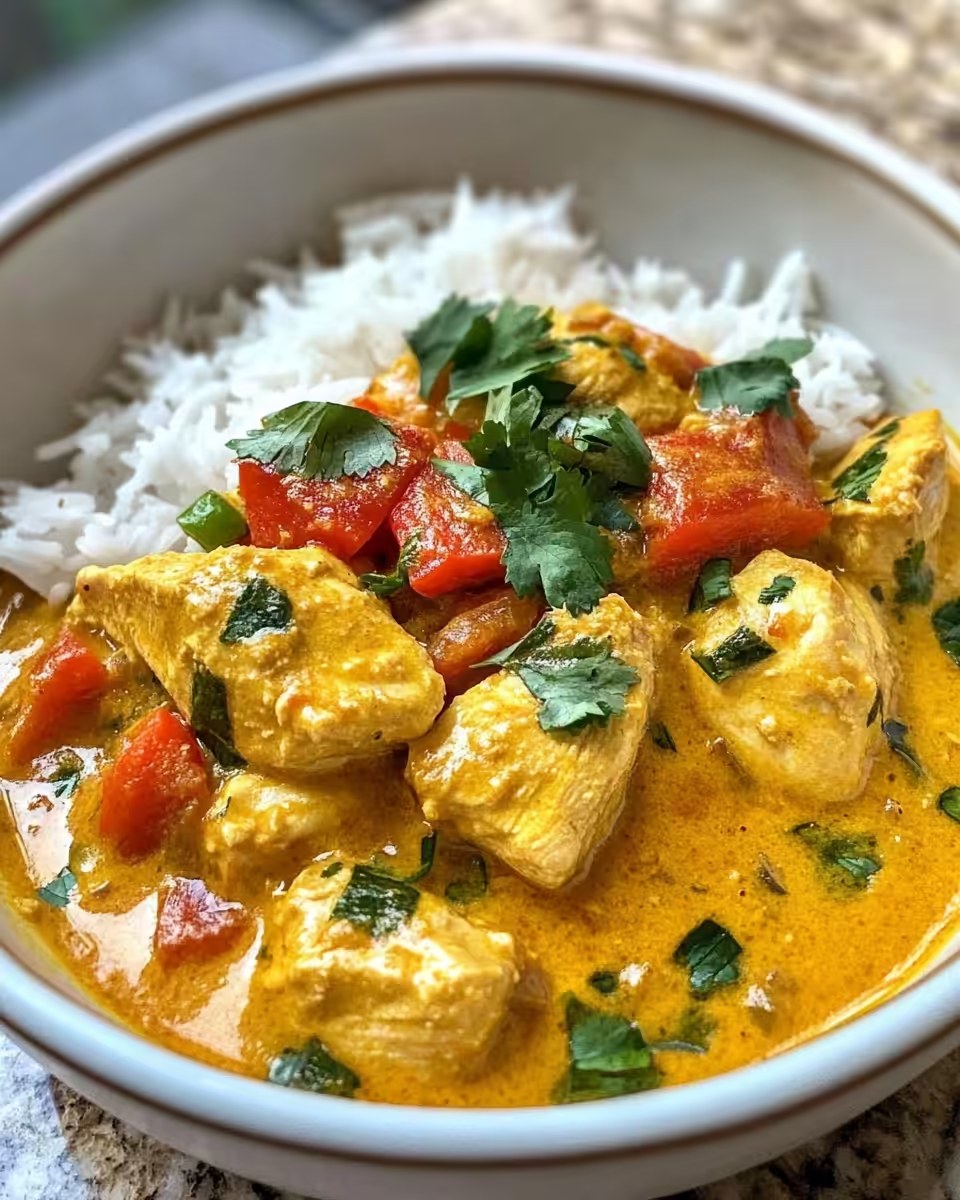
That First Bite Moment
You pick up your spoon and that first bite hits the spot kinda like a warm hug on a busy day. The chicken’s tender pull feels just right, not dry or tough, pretty much melts in your mouth.
The sauce? It’s creamy and rich from that full-fat coconut milk, and spicy in just the right way from the red curry paste. You notice little pops of fresh lime and herbs that keep every bite bright and exciting.
And when you get bits of red pepper or a sprinkle of peanuts on top, it adds tiny bursts of texture and flavor that keep you coming back for just one more spoonful.
Keeping Leftovers Fresh and Ready
Store leftovers in airtight containers to keep all those curry scents inside and fresh. You gonna want to cool the curry a bit before sealing containers or freezer bags.
Refrigerate usually lasts around 3 to 4 days if you’re good about reheating it well. You can also freeze portions for up to 2 months—just thaw overnight in the fridge before reheating.
When you reheat, add a splash of water or broth to loosen things up and keep that creamy texture smooth. Stir gently over low heat till you see it steaming with flavor again.
If you packed it for lunch, microwave till hot but careful not to overdo it since chicken can get dry if nuked too hard.
Everything Else You Wondered About
- Can I use thighs instead of breasts? Yeah totally, thighs are juicier and work great for tender pull in curry.
- What if I want it less spicy? Cut back on red curry paste or skip it, the yellow curry powder alone still gives nice flavor.
- Do I need fish sauce? Not at all, it’s optional but adds umami if you got it handy.
- Is coconut milk really necessary? For that creamy broth depth absolutely. Don’t use lite versions or it won’t get that rich texture.
- Can I make this vegetarian? For sure but swap chicken with chickpeas or tofu pressed well and adjusted cook time.
- Should I always do slow release? Yeah slow release keeps the tough bits tender and sauce thick without splatter or drying out chicken.
Coconut Curry Chicken Made Easy in Your Pressure Cooker
Equipment
- 1 Skillet or pressure cooker sauté mode for browning and cooking
Ingredients
Main ingredients
- 1 lb Boneless skinless chicken breast or thighs cut into 1-inch pieces
- 3 cloves Garlic minced
- 2 tablespoon Fresh ginger finely minced
- 2 teaspoon Ground coriander
- 2 teaspoon Yellow curry powder
- 3 tablespoon Red curry paste adjust to taste
- 1 tablespoon Fresh lime juice
- 3 tablespoon Coconut oil divided
- 1 Large red bell pepper sliced
- 0.5 Medium yellow onion diced
- 1-2 tablespoon Brown sugar
- 2 teaspoon Fish sauce optional
- 1 can Full-fat coconut milk not lite
- 0.25 cup Chopped cilantro or basil
- Fine sea salt and freshly cracked pepper to taste
- Cooked basmati rice or naan bread for serving
- Chopped peanuts or cashews optional for garnish
Instructions
Instructions
- Heat 2 tablespoons of coconut oil in a large skillet over medium-high heat. Toss in your chicken pieces and brown them on all sides. Remove chicken and set aside.
- In the same skillet, add the last tablespoon of coconut oil. Add minced garlic and ginger, sauté for 1-2 minutes until fragrant.
- Stir in ground coriander, yellow curry powder, and red curry paste. Cook for another 1-2 minutes to bloom the spices.
- Add sliced red bell pepper and cook for 3-4 minutes until slightly softened.
- Pour in coconut milk and bring to a light simmer. Add chicken back to the pan and stir well to combine.
- Transfer mixture to the pressure cooker pot. Lock lid and pressure cook for 8 to 10 minutes.
- Allow pressure to release slowly when done cooking.
- Stir in lime juice and season with salt and pepper to taste.
- If using, stir in fish sauce for added umami.
- Serve hot over basmati rice or naan bread. Garnish with chopped cilantro or basil.
- Top with chopped peanuts or cashews for extra crunch, if desired.


Leave a Reply