
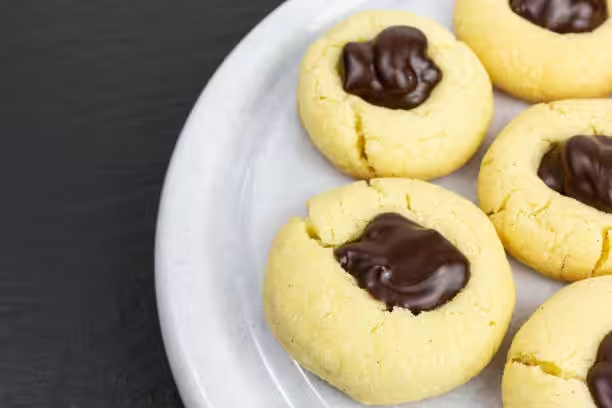
Chocolate thumbprint cookies are like a mash up of rich chocolate and sweet stuff, it’s a treat thats nice to look at and even nicer to eat. These cookies got a soft, chocolatey base with a little dent in the middle thats packed with jam, chocolate ganache, or nut buter so every bite is a tasty surprise. Their cute look and yummy taste make them a favorite for cookie fans all around.
Baking cookies is a big deal in lots of homes—its about comfort, celebration, and family time. You might see these cookies at birthdays, holidays, or just on a regular Tuesday when you want something special. Chocolate thumbprint cookies bring a fun twist to the usual, letting new bakers and pros alike try out their own ideas.
In this post we’ll dig into where thumbprint cookies came from, check out how different foods and cultures put their own spin on them, and see why the chocolate version stands out. You’ll also get a full list of ingredients, a step-by-step recipe, and some real-life tips so you can make these at home without a fuss.
History of Thumbprint Cookies
Thumbprint cookies have been around for ages, first popping up in Europe. Back then, bakers used simple stuff—flour, butter, sugar—and pressed their thumb in the dough to hold sweet fruit jam. The earliest recipes came from places like Sweden and Denmark, where they loved using local berry jams to show off their flavors.
When these cookies crossed the ocean to America, people started to tweak them. They added chocolate, nuts, different spices, and made the dough itself chocolatey. Thats how we got the popular chocolate thumbprint cookie we know today.
All over the world, thumbprint cookies are a symbol of togetherness. In Jewish homes they’re called “mokey” and are made for Hanukkah. No matter how you fill them, these cookies remind us of family, friends, and sweet moments.
Why Choose Chocolate Thumbprint Cookies?
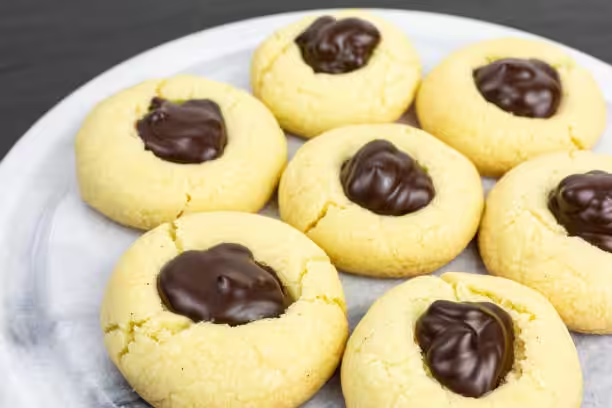
Chocolate thumbprint cookies hit two cravings at once: chocolate and a surprise filling. The soft cocoa dough is rich but not too heavy, and the filling adds a fresh burst—be it fruit jam, silky ganache, or nut butter. Every bite is like a tiny party in your mouth.
One great thing about these cookies is you can switch up the filling any way you want. Try pumpkin spice in fall, or raspberry jam in spring. Salted caramel, peanut butter, even lemon curd—there’s no limit. It’s an easy way to make a batch that fits any occasion, from Christmas cookie exchanges to sleepover snacks.
They also make a sweet gift. Wrapped up in a pretty box, these cookies look as good as they taste. Whoever gets them will feel special, so it’s a simple but thoughtful present for friends, family, or teachers.
Ingredients for Chocolate Thumbprint Cookies
Here’s what you need to make these cookies turn out just right:
- Basic Ingredients:
- All-purpose flour
- Cocoa powder
- Granulated sugar
- Eggs
- Unsalted butter
- Optional Ingredients:
- Chopped nuts (walnuts or pecans)
- Flavorings like vanilla or almond extract
If you need to adapt, swap regular flour for a gluten-free blend or use plant-based butter and egg replacer for a dairy-free version. It still comes out great.
Step-by-Step Recipe for Chocolate Thumbprint Cookies
Directions
1. Prep: Gather all your stuff and preheat the oven to 350°F (175°C).
2. Make the Dough: Mix flour, cocoa, and sugar in one bowl. In another bowl, beat butter and eggs until smooth. Combine wet and dry ingredients till you get a dough. Chill it for about 30 minutes so it’s easier to handle.
3. Shape Cookies: Roll dough into balls, about 1 inch wide. Place them on a baking sheet lined with parchment. Press your thumb (or a spoon handle) into each ball to make the thumbprint.
4. Bake: Bake for 10–12 minutes, until cookies are set but still soft. Don’t let them overbake or they’ll end up dry.
5. Add Filling: Let them cool a bit, then fill each indent with jam, ganache, or nut butter while still warm.
6. Cool & Serve: Move cookies to a wire rack to cool completely. They’re best fresh, but you can keep them in an airtight container for days.
Tips for Success
To make these turn out perfect:
- Chill the dough—if it’s too soft, cookies will spread too much.
- Take them out when they’re just set; they’ll firm up as they cool.
- Have fun with fillings—mix flavors for a fun twist.
Variations on the Classic Recipe
You can play around with these cookies lots of ways:
- Different Chocolate Types:
- Dark chocolate for a richer bite.
- Milk chocolate for sweetness.
- White chocolate for a creamy contrast.
- Filling Options:
- Fruit jams like raspberry, apricot, or strawberry.
- Caramel sauce for a gooey center.
- Cream cheese filling for a tangy edge.
- Toppings & Flavors:
- Sprinkle sea salt for a sweet-savory hit.
- Add chopped nuts for crunch.
- Use colorful sprinkles for a party vibe.
Nutritional Information
Every cookie is a treat, and here’s a rough idea of what’s in one:
- About 90–120 calories
- 5–7 grams of fat
- 10–15 grams of carbs
- 1–2 grams of protein
If you want to make them healthier, try coconut sugar or maple syrup, and swap in whole-grain flour for extra fiber.
Storage Tips
Keep your cookies fresh with these ideas:
- Store in an airtight container at room temp for up to a week.
- Freeze in a single layer, then move to a freezer bag for up to three months.
- Thaw at room temp or reheat in the oven for a few minutes.
FAQs about Chocolate Thumbprint Cookies
What are chocolate thumbprint cookies made of? They’re made from chocolate dough (flour, cocoa, sugar, eggs, butter) and filled with stuff like jams, ganache, or nut butters.
How do you keep thumbprint cookies from spreading? Chill the dough first and don’t overmix the flour.
Can I use dark chocolate in the thumbprint cookies? Yep, dark chocolate works great in both dough and filling for a richer taste.
What is the best filling for chocolate thumbprint cookies? It’s up to you! Jams, ganache, and nut butters are all super popular.
Can I make the dough ahead of time? Sure, you can chill it in the fridge for 2 days or freeze it longer. Just let it soften a bit before rolling.
Conclusion
Chocolate thumbprint cookies blend flavors and textures in a way thats hard to beat. With a rich chocolate base and tons of filling options, they’re perfect for parties, holidays, or just a cozy night in. Give them a try and see how they become your new go-to cookie!
Call to Action
Tell us how it went! Leave a comment below about your favorite fillings or any fun twists you tried. And don’t forget to share this recipe with friends so everyone can enjoy the baking fun!
chocolate thumbprint cookies
Equipment
- 1 mixing bowls
- 1 electric mixer or whisk
- 1 baking sheet
- 1 parchment paper
- 1 measuring cups and spoons
- 1 cookie scoop or spoon
- 1 oven
Ingredients
- 1 cup unsalted butter softened
- 1 cup granulated sugar
- 1 teaspoon vanilla extract
- 2 cups all-purpose flour
- ¾ cup unsweetened cocoa powder
- ½ teaspoon salt
- ½ teaspoon baking powder
- 1 cup chocolate chips for filling (or jam, if desired)
- optional for dusting powdered sugar for dusting
Instructions
- Preheat your oven to 350°F (175°C). Line a baking sheet with parchment paper.
- In a large mixing bowl, cream the softened butter and granulated sugar together using an electric mixer or whisk until light and fluffy.
- Mix in the vanilla extract.
- In another bowl, whisk together the all-purpose flour, cocoa powder, salt, and baking powder. Gradually add the dry ingredients to the wet mixture, stirring until just combined.
- Use a cookie scoop or spoon to drop tablespoons of dough onto the prepared baking sheet, spacing them about 2 inches apart.
- With your thumb or the back of a spoon, create an indentation in the center of each cookie.
- Bake in the preheated oven for 12-15 minutes, or until the edges are firm but the center is still soft.
- While the cookies are baking, melt the chocolate chips in a microwave-safe bowl in 30-second intervals, stirring between each interval until smooth. Allow the melted chocolate to cool slightly.
- Once the cookies are out of the oven and cooled for a few minutes, fill each thumbprint with the melted chocolate or your choice of jam.
- Allow the cookies to cool completely before serving. Optionally, dust with powdered sugar for extra sweetness.
Leave a Reply