
The pot lid rattles and you know dinner is almost ready.

But wait, this time it ain’t dinner, it’s Christmas cookie magic right in your pressure cooker. You catch that feeling where you gotta get those treats ready for your holiday box. It’s that kinda excitement when you know something sweet and satisfying’s gonna come out real soon.
You spot the float valve just popped up, so you’re about to do a quick release and get those cookies outta the pot. The smell of butter and sugar fills your kitchen and you can’t help but sneak a little taste. It’s Christmas eve kinda good, but better cause you did it fast and easy with your pressure cooker.
Every time you make these you notice how simple the process is. No fuss, no mess, just pure yum. The sealing ring holds in all that heat so your cookies come out soft but just right on the edges. You zip through the steps and you got yourself a dozen cookies ready to box up and gift or keep for snacking.
Why This Recipe Works Every Single Time
- The sealing ring keeps a tight seal so moisture stays locked in your dough.
- Using quick release helps you stop the cooking at the perfect moment.
- Simple ingredients mean less room for error if you’re in a rush.
- Chilling the dough makes it easier to roll and cut shapes without sticking.
- You get a soft texture with just enough crisp edges from the 8-10 min bake.
- Natural release helps settle flavors if you wanna let cookies finish gently.
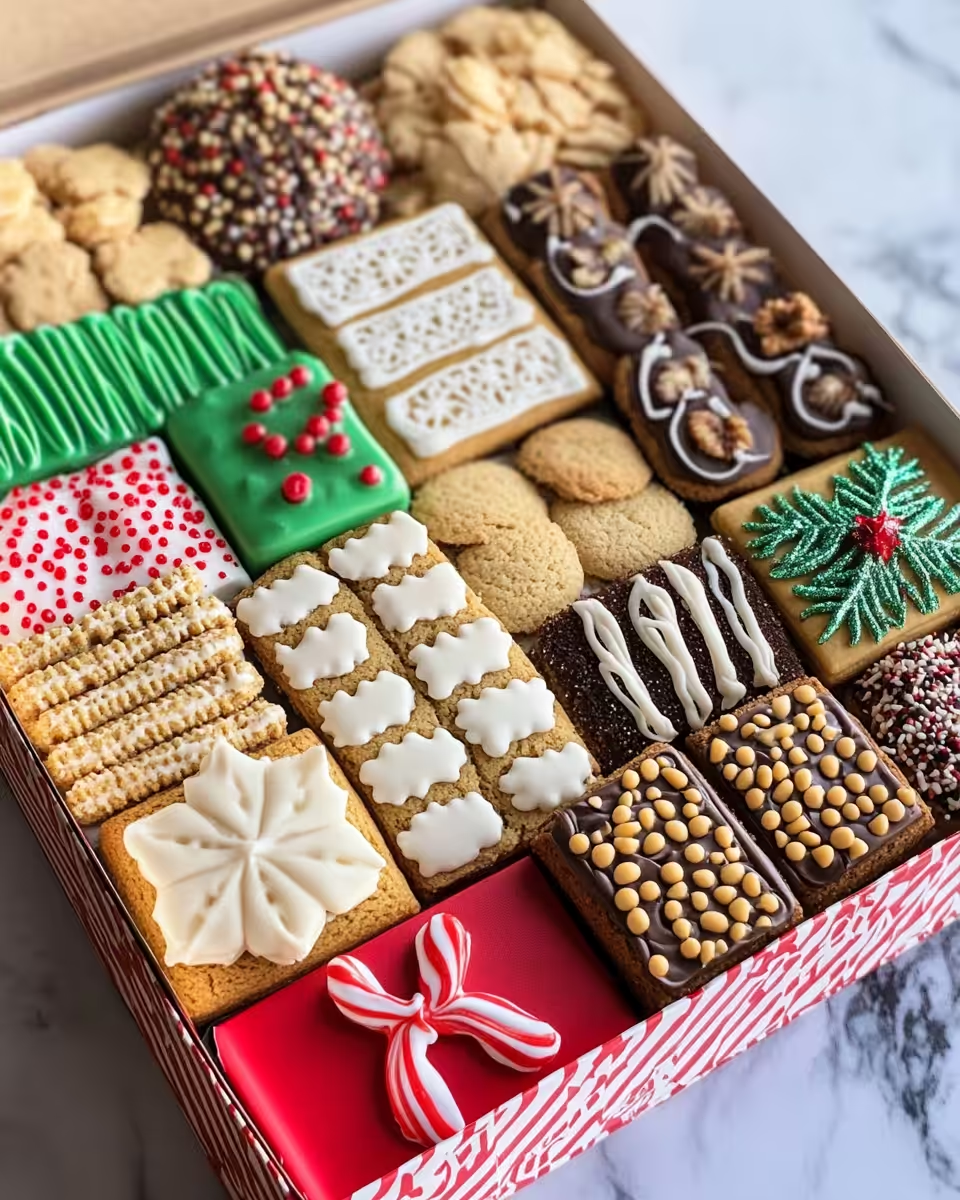
- Decorating with sprinkles adds festive fun that everyone’ll love.
What Goes Into the Pot Today

- 2 cups all-purpose flour
- 1 cup unsalted butter, softened
- 1 cup granulated sugar
- 1 large egg
- 1 teaspoon vanilla extract
- ½ teaspoon baking powder
- ¼ teaspoon salt
- Assorted sprinkles and colored sugars for decorating
- Powdered sugar and 1-2 tablespoon milk for icing
These ingredients are simple but hearty. You get plenty of buttery richness from that softened butter. The sugar and vanilla add the sweet warmth you want in every Christmas cookie bite. Flour’s the base holding it all together, and baking powder gives just a little puffiness without blowing the cookies up too much.
The salt balances all the sweetness and makes those flavors pop. You’ll wanna have your sprinkles and colored sugars ready because they bring personality to your cookie box. Lastly, the powdered sugar and milk come together in a smooth icing that you drizzle on top after baking. It’s that finishing touch that makes your cookies look almost too good to eat.
Walking Through Every Single Move
1. Preheat your oven to 350 degrees Fahrenheit and line your baking sheets with parchment paper. This step gets you ready for a smooth cookie bake.
2. Grab a large bowl and cream together the softened butter with the granulated sugar. You wanna mix until it’s light and fluffy, no big lumps left behind.
3. Crack the egg into your bowl and add the vanilla extract. Stir it up until everything blends smooth and you see that creamy consistency.
4. In another bowl, whisk your all-purpose flour, baking powder, and salt together real good. This helps spread the leavening and seasoning evenly.
5. Gradually add your dry mix to the wet bowl. Stir gently till it turns into a soft dough that’s nice to work with but not sticky.
6. Split the dough into two halves, flatten each into a disk and wrap them up in plastic. Chill them in the fridge for about 30 minutes. This cool down stops the dough from getting all sticky and makes rolling easier.
7. On a floured surface, roll out your dough to about a quarter inch thickness. Cut out your cookie shapes with cutters or a knife. Place them on the baking sheets and sprinkle them with your colorful sugars and sprinkles.
Bake for 8 to 10 minutes until the edges get just lightly golden. Let ’em cool completely on wire racks. Mix your powdered sugar with milk to make a smooth icing. Drizzle it over your cooled cookies and wait till it sets before you pack ’em up.
Easy Tweaks That Make Life Simple
- You can skip chilling if you’re super pressed for time, but cookies might spread more, so just know that going in.
- Instead of decorating before baking, try waiting till cookies cool. Less mess and you get sharper, cleaner sprinkles on top.
- Use a cookie scoop to portion dough in equal sizes instead of rolling and cutting shapes for faster baking.
- Double batches freeze well, so make extras and pop some in your freezer before decorating.
Your First Taste After the Wait
When you bite into one, your teeth sink through that soft buttery dough just slightly crisp on the edges. The vanilla hits your taste buds right away, blending with that warm sugar sweetness that tastes like holidays.
Sprinkles or colored sugar add a little crunch and that fun pop of color you smile at before you eat it. The icing drizzled on tops adds a smooth sugary glaze that melts in your mouth and keeps you wanting just one more.
You feel that cozy, festive warmth all around your kitchen and your body thanks you for taking the time for these homemade treats. Yep, it’s worth every minute.
Smart Storage That Actually Works
- Store your cookies in an airtight container with parchment paper layers in between to keep ’em fresh and prevent sticking.
- For longer storage, freeze your cookies in sealed freezer bags. Just thaw ’em at room temp before you pack your box.
- Wrap the cookies individually in plastic wrap for gifting so they stay super fresh and look tidy when opened.
Keeping cookies in airtight containers stops that pesky dryness from sneaking in. Layering parchment protects your pretty sprinkles and icing. Freezing works best if you wanna bake ahead and keep holiday stress low. Don’t forget that wrapping individually means your gifts last longer and feel special.
Your Most Asked Questions Answered
Q1. Can I make the dough ahead and freeze it?
You betcha. Wrap that dough tight in plastic and freeze it. Just thaw in the fridge overnight before rolling and cutting.
Q2. What if the cookies spread too much while baking?
Try chilling your dough longer next time or check if your butter’s too soft. Too warm dough spreads easier.
Q3. Can I use brown sugar instead of granulated?
Yeah you can but the cookies get a bit chewier and darker. It’s a tasty swap if you like that richer vibe.
Q4. How do I know when to quick release or natural release?
For cookies, usually a quick release right after pressure cooking keeps them soft. Natural release suits dishes needing slow flavor meld.
Q5. What if my float valve doesn’t pop up?
Usually means the pressure isn’t reached yet or your sealing ring ain’t seated right. Check the ring and try again.
Q6. Can I add spices like cinnamon or nutmeg?
Totally! Add small amounts like ½ teaspoon to dough mix and you’ll get cozy holiday spice vibes without overpowering.

Christmas Cookie Box: 12 Delicious Recipes & Packing Tutorial
Ingredients
Main Ingredients
- 2 cups all-purpose flour
- 1 cup unsalted butter softened
- 1 cup granulated sugar
- 1 large egg
- 1 teaspoon vanilla extract
- ½ teaspoon baking powder
- ¼ teaspoon salt
- assorted sprinkles and colored sugars for decorating
- powdered sugar for icing
- 1-2 tablespoon milk for icing
Instructions
Instructions
- Preheat oven to 350°F and line baking sheets with parchment paper.
- Cream butter and sugar in a large bowl until light and fluffy.
- Add egg and vanilla extract. Mix until smooth and creamy.
- In another bowl, whisk flour, baking powder, and salt.
- Gradually add dry mix into wet ingredients. Stir gently into soft dough.
- Divide dough in half, flatten into disks, wrap in plastic, and chill for 30 minutes.
- Roll dough on floured surface to ¼ inch thickness. Cut shapes and place on sheets.
- Decorate with sprinkles and sugars.
- Bake 8–10 minutes until edges lightly golden. Cool on wire racks.
- Mix powdered sugar and milk until smooth. Drizzle over cooled cookies.
- Let icing set completely before packaging or serving.
Leave a Reply