
Steam curls up from the valve and your stomach starts talking back. You know that moment when your pressure cooker’s sealing ring locks in the heat and pressure build begins? That’s when you start feelin' like dinner's gonna be real good tonight.
Chop-chop, you got chicken all ready, batter mixed, and oil feelin' hot enough for that crispy fry. Your hands sorta sticky from the egg dip and that cornstarch-flour mix, but it’s all part of the fun. You peek at your phone timer cause you can’t wait to taste this Sweet Fire Chicken in all its crispy, saucy glory.
The pressure cooker hums quietly, and steam sneaks out a little valve puff every so often. You recall it’s that quick release coming up soon – when you can finally lift the lid and see that tender pull of perfectly cooked chicken, coated in spicy, sweet heat. Ready to dive in yet? Me too.
Why Your Cooker Beats Every Other Pot
- Pressure builds fast for hands-off cooking.
- Locks in moisture for tender chicken every time.
- Works great for frying and simmering sauces all in one pot.
- Quick release valve means no waiting around forever.
- Sealing ring keeps steam and flavors trapped inside.
- Easy cleanup with fewer dishes to wash.
- Consistent heat lets you nail textures like crispy outside and juicy inside.
What Goes Into the Pot Today
- 1 ½ lbs boneless skinless chicken breasts, cut into 1 inch pieces
- 2 large eggs, beaten
- 1 cup cornstarch
- ¼ cup flour
- Canola or vegetable oil for frying
- 1 tablespoon canola oil for stir-frying veggies
- 1 medium yellow onion, thinly sliced
- 1 red bell pepper, thinly sliced
- 2 cups pineapple chunks
- ½ cup sweet chili sauce
- 2 teaspoons Asian chili paste
- 2 teaspoons sesame seeds for garnish
- Sliced green onions for serving
These ingredients come together to give you that classic Sweet Fire Chicken vibe. The cornstarch and flour combo creates a crunchy crust that holds up well after you toss everything in the sauce. Pineapple adds that juicy pop which pairs perfect with the spicy chili paste. You’ll find the pressure cooker's gonna help keep the sauce thick and clingy without turning soggy.
The Full Pressure Cooker Journey
- In a medium bowl, you combine cornstarch and flour. Mix it up so it’s even.
- Dip those chicken pieces into beaten eggs, then dredge in that cornstarch mixture to coat em well. You don’t want bare spots here.
- Pour a few inches of canola or vegetable oil into a deep pan and heat it over medium-high. You’re looking for about 350°F if you keep a thermometer handy.
- Work in batches, frying chicken pieces 'til golden brown and cooked through, usually about 4-5 minutes. Once done, drain ‘em on paper towels to keep crispy.
- Switch your pressure cooker pot to stove mode. Heat 1 tablespoon canola oil, then add the thinly sliced onion and red bell pepper. Stir-fry for 2-3 minutes ‘til they soften just a bit.
- Add pineapple chunks and the fried chicken into the pot with veggies. Stir it gently to mix things up but don’t break the crispiness.
- Pour in sweet chili sauce and Asian chili paste. Stir to coat every bite. Close the lid, sealing ring in place, and set to pressure cook for 2 minutes to let flavors meld.
- Once the pressure cook timer beeps, do a quick release. Carefully open the lid and give it one last gentle stir. Sprinkle sesame seeds and sliced green onions on top before serving.
Easy Tweaks That Make Life Simple
- You can swap chicken breasts for thigh meat if you want a juicier tender pull.
- Use frozen pineapple chunks to save prep time, just thaw a bit before adding.
- Skip deep frying and air fry the coated chicken pieces for less oil mess.
- Double up the chili paste if you like heat that bites back.
- Make extra sauce and keep it on the side for dipping crispy bites.
When You Finally Get to Eat
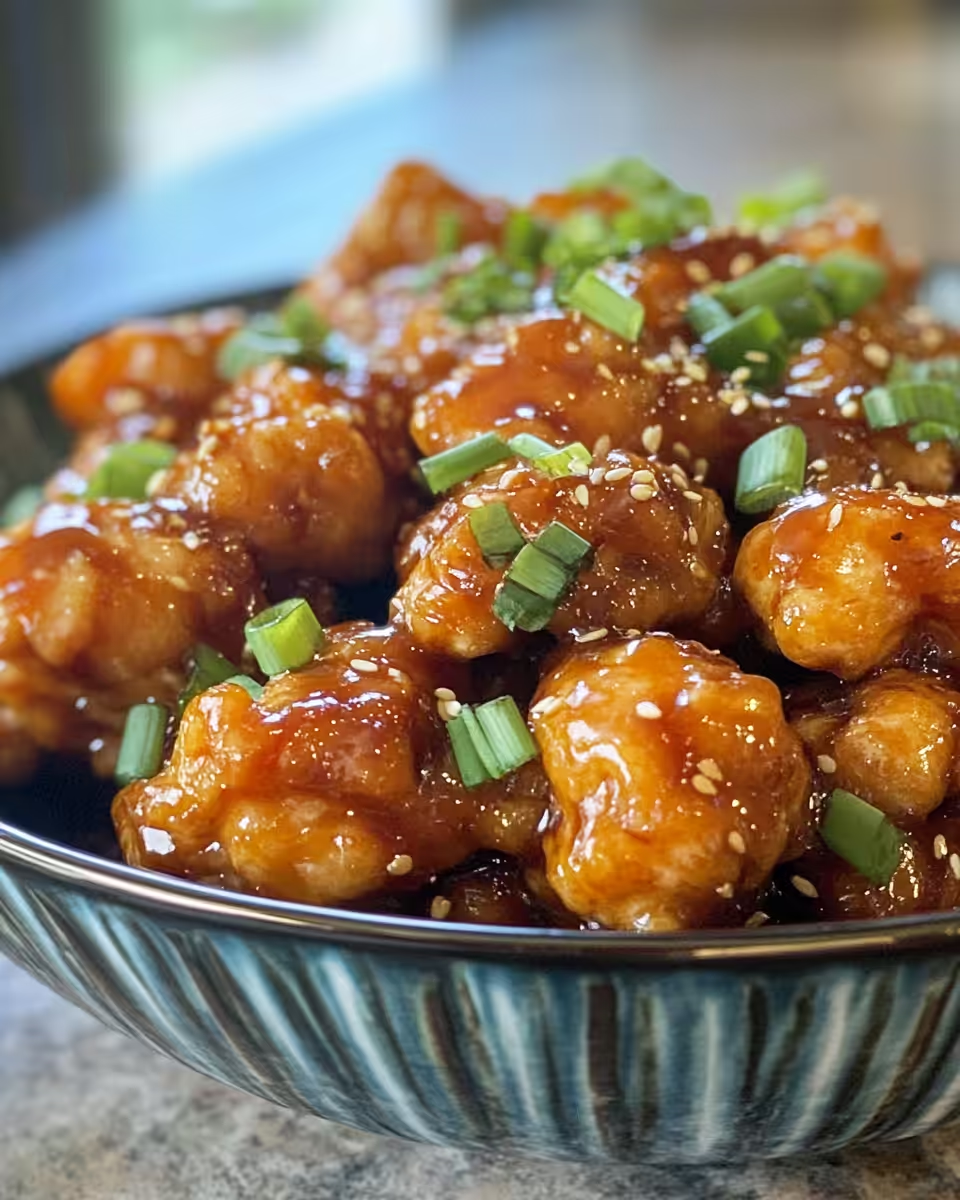
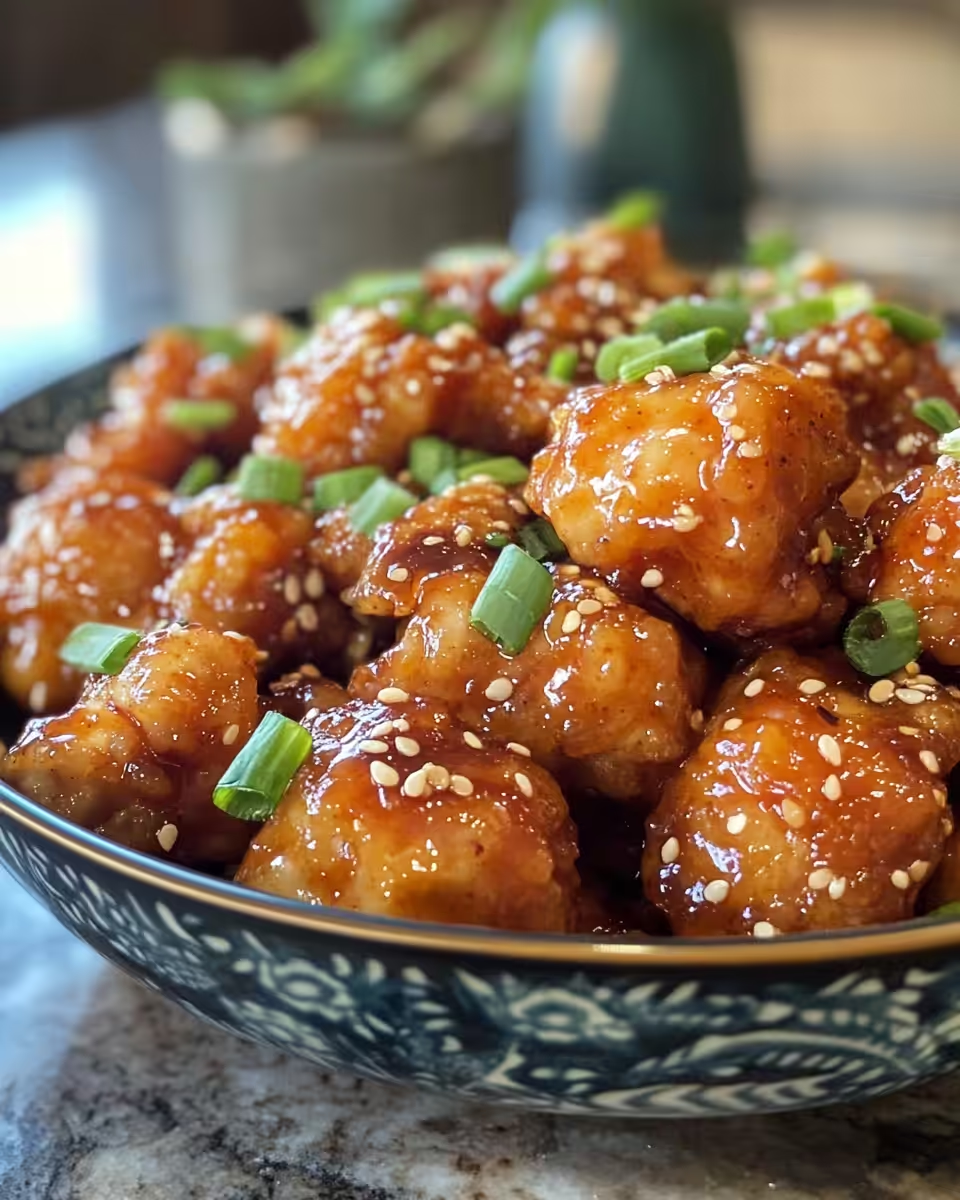
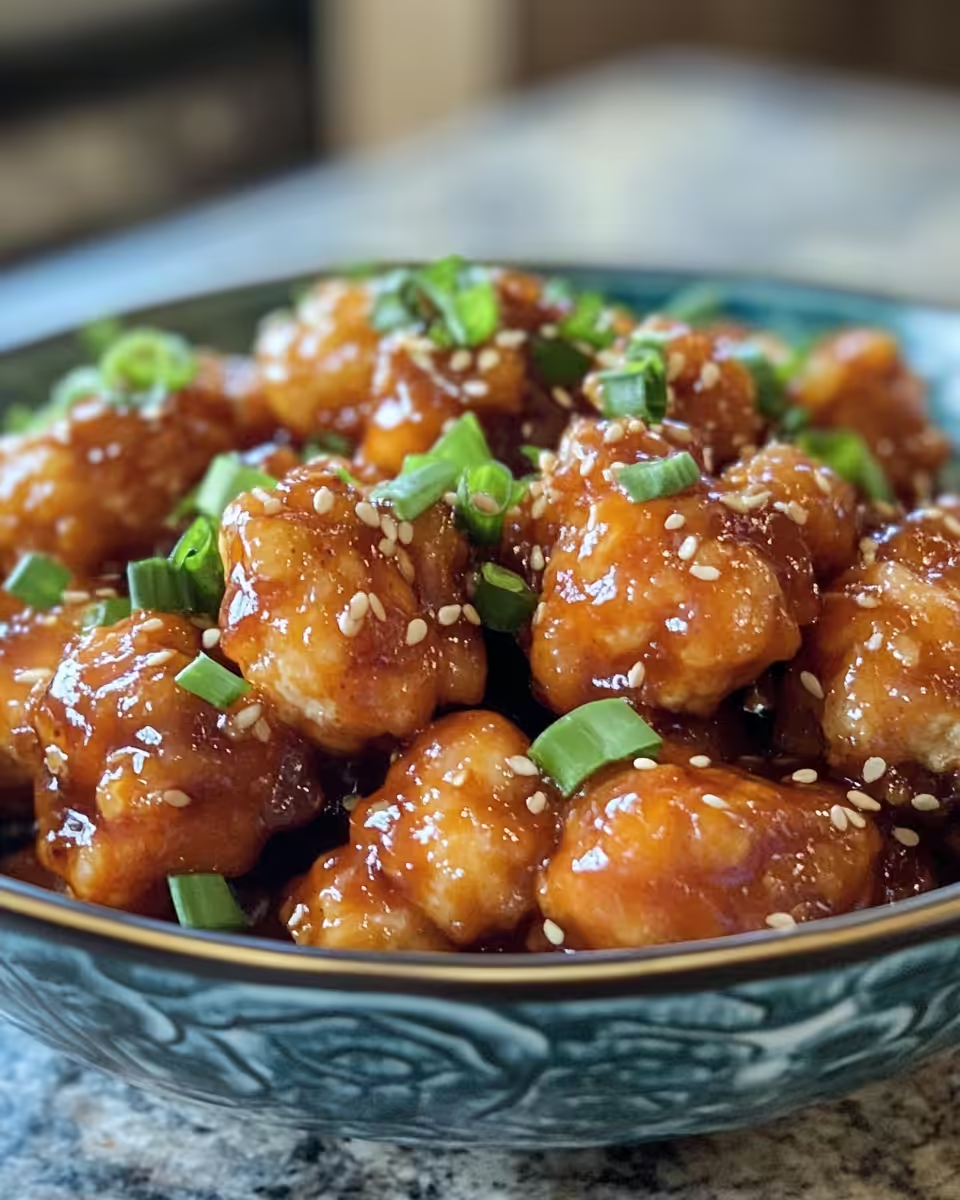
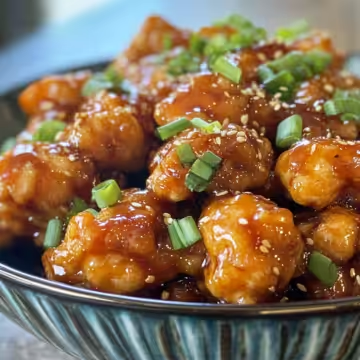
You see that golden crispy chicken all coated in a sticky sweet and spicy sauce. The pineapple chunks add this bursts of juicy tang that cuts through the heat just right.
Each tender piece has this perfect bite where the outside crunch meets juicy inside. You feel it’s like the kinda dinner worth waiting for after the slow release lets the flavors do their thing.
The thinly cooked onions and red bell pepper add a gentle sweetness and crunch that balances out the whole plate real nice. Sesame seeds sprinkle the top giving just a little nutty finish you wouldn’t wanna miss.
Serve it hot with some steamed rice to soak up every drop of that sauce. You remember why you like cooking in a pressure cooker - it hits all the right notes every time.
How to Store This for Later
- Cool the chicken mixture at room temp for no more than an hour before storing.
- Transfer into airtight containers. You can keep it in the fridge and eat within 3-4 days.
- For longer storage, freeze in portioned containers. Thaw overnight in the fridge before reheating gently in the microwave or stovetop. Avoiding overheating keeps that crispy coating from turning mushy.
If you find the sauce thickened too much after storing, just splash a little water or broth when reheating to loosen it without losing flavor. You’re gonna appreciate how the pressure cooker keeps the chicken tender and flavorful even after chilling.
Common Questions and Real Answers
- Can I use boneless skinless chicken thighs instead of breasts?
You sure can. Thighs stay juicier and give you a bit more flavor. Just adjust your frying time since thighs might need a little extra. - Do I have to deep fry the chicken?
Deep frying helps get the crisp crunch but you can air fry or even pan fry if you wanna skip deep frying. Just watch your temps so it crisps up right. - What if I don’t have Asian chili paste?
Use sriracha or any chili garlic sauce you got on hand. It works real good to bring that heat and flavor. - How do I prevent soggy chicken after cooking in the pressure cooker?
Frying first is key. Then quick release after cooking helps keep the crust crisp before it soaks too long in sauce. - Can I make this recipe gluten free?
Swap the flour for rice flour or cornstarch only. Make sure your chili sauce is gluten free too. - Why does the sealing ring matter?
Your sealing ring keeps pressure and steam inside so your chicken cooks evenly and perfectly tender. If it’s worn or cracked, your cooker won’t build right pressure.
Panda Express Sweet Fire Chicken (Copycat) with Your Pressure Cooker
Equipment
- 1 Pressure cooker with sauté mode
- 1 Mixing bowl Medium size
- 1 Deep pan for frying
Ingredients
Main ingredients
- 1 ½ lbs boneless skinless chicken breasts cut into 1 inch pieces
- 2 large eggs beaten
- 1 cup cornstarch
- ¼ cup flour
- Canola or vegetable oil for frying
- 1 tablespoon canola oil for stir-frying veggies
- 1 medium yellow onion thinly sliced
- 1 red bell pepper thinly sliced
- 2 cups pineapple chunks
- ½ cup sweet chili sauce
- 2 teaspoons Asian chili paste
- 2 teaspoons sesame seeds for garnish
- sliced green onions for serving
Instructions
Instructions
- In a medium bowl, mix cornstarch and flour until evenly combined.
- Dip chicken pieces into beaten eggs, then dredge in the cornstarch mixture to coat well.
- Heat a few inches of oil in a deep pan over medium-high heat until it reaches about 350°F.
- Working in batches, fry chicken pieces 4–5 minutes until golden brown and cooked through. Drain on paper towels.
- Switch pressure cooker to sauté mode. Heat canola oil, then add onion and bell pepper. Stir-fry for 2–3 minutes until slightly softened.
- Add pineapple chunks and fried chicken to the pot. Stir gently to combine.
- Pour in sweet chili sauce and chili paste. Stir to coat, close lid with sealing ring, and pressure cook for 2 minutes.
- After timer beeps, do a quick release. Open lid and stir gently.
- Top with sesame seeds and green onions before serving.


Leave a Reply