
Mini cheesecakes is small versions of a cheesecake that lots of people cant get enough of. They pack that rich, creamy cheesecake taste into a bite size treat, so you dont end up eating a huge slice. You can try different flavors and toppings since each one is its own little dessert, and that makes them fun for quick snacks or fancy get togethers.
These tiny desserts are popping up at birthdays, holidays, weddings, and just about every potluck you go to. You dont need to cut a big cake so everyone can grab one flavor they like and move on to something else. Plus you can make them no bake or add whatever you want on top from fruit to chocolate and even make them fit special diets.
In this post we’ll cover what mini cheesecakes are, why they work for any event, the main ingredients, tools you’ll need, plus tips to get them just right. We’ll also share a simple recipe for classic mini cheesecakes, ideas for different versions, and how to store or freeze them. It doesnt matter if you’ve never baked before, you’ll find everything you need right here to make these tiny treats.
What Are Mini Cheesecakes?
Mini cheesecakes are just small cheesecakes made in muffin tins or little ramekins. They taste just like a big cheesecake with that smooth, creamy filling but in a smaller portion. That means you can have a taste without feeling stuffed, or you can try more than one flavor.
Normal cheesecakes usually bake in a big pan but mini cheesecakes come in all sorts of styles. You can do baked or no bake, and pick a crust from graham crackers to Oreos or gluten free crumbs. This way everyone at the party can enjoy one, no matter what they like or need to avoid.
Why Mini Cheesecakes are Perfect for Any Occasion
Mini cheesecakes fit in at pretty much any party. Birthdays, holiday dinners, wedding showers, potlucks. You name it. Since they’re already portioned, no one has to wait while someone slices up a big cake. Guests can grab exactly what they want and move on.
They also help you keep track of portions, so people dont feel too full or waste food. Each person gets their own dessert, no messy cutting. And you can make them gluten free, dairy free or vegan so everyone at the table is happy.
Essential Ingredients for Mini Cheesecakes
To whip up mini cheesecakes you need a few key ingredients. Here’s what you’ll want to have on hand:
- Cream Cheese: Full fat is best for that rich, smooth texture.
- Sugar: Granulated sugar for a classic taste or powdered sugar for extra smoothness.
- Eggs: They help the filling set and add extra richness. Use large eggs so it turns out the same each time.
- Graham Cracker Crust: Crush graham crackers and mix with melted butter to form the base. You can swap in Oreos or gluten-free cookies if you need.
- Flavorings: Vanilla extract, fruit purees, or melted chocolate make the filling even better.
Equipment Needed
Having the right tools makes baking mini cheesecakes a lot easier. Grab these items before you start:
- Muffin Tin or Mini Cheesecake Pan: This is what gives them their shape.
- Mixing Bowls: A few different sizes helps keep things organized.
- Electric Mixer: A hand or stand mixer is best for a smooth batter.
- Parchment Paper or Cupcake Liners: Makes it super easy to pop them out when they’re done.
- Measuring Cups and Spoons: Accurate measurements are key for consistent results.
Tips for Making the Perfect Mini Cheesecakes
Follow these tips so your mini cheesecakes come out tasting amazing every time:
- Room Temperature Ingredients: Let your cream cheese and eggs sit out for a bit so they mix smooth, no lumps.
- Mixing Techniques: Start on low speed to avoid too much air in the batter, that can cause cracks when baking.
- Baking Tips: Dont overbake them. The centers should jiggle a little when you take them out. A water bath helps bake them evenly and stops cracks.
- Cooling and Storage: Let them cool at room temp before going in the fridge. Store in an airtight container so they stay fresh.
Detailed Recipe: Classic Mini Cheesecakes
Ingredients
- 8 oz cream cheese (softened)
- ½ cup sugar
- ½ teaspoon vanilla extract
- 1 large egg
- 1 cup graham cracker crumbs
- ¼ cup butter (melted)
- Toppings: fruit, chocolate, whipped cream, etc.
Directions
- Preheat the Oven: Set oven to 325°F (160°C).
- Prepare the Crust: Mix graham cracker crumbs with melted butter in a bowl. Press into bottom of each muffin cup.
- Make the Filling: Beat cream cheese, sugar and vanilla until smooth. Add the egg slowly and mix until just combined.
- Bake: Fill each crust about ⅔ full with the filling. Bake for 15–20 minutes or until the edges look set but the centers still jiggle.
- Cool and Serve: Let them cool completely, then chill in the fridge for at least 2 hours. Top before serving.
Advice and Variations
You can try these fun twists on the classic recipe:
- Chocolate Mini Cheesecakes: Stir melted chocolate into the batter for a rich version.
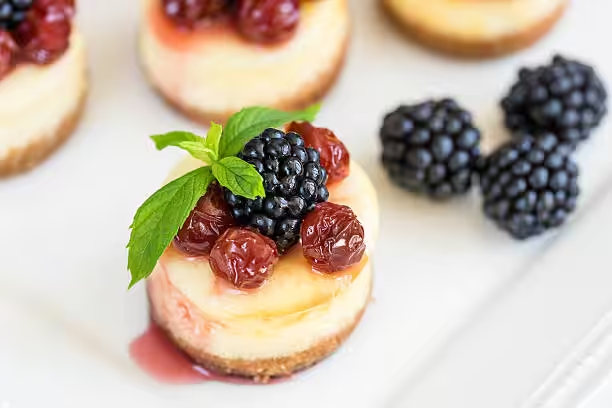
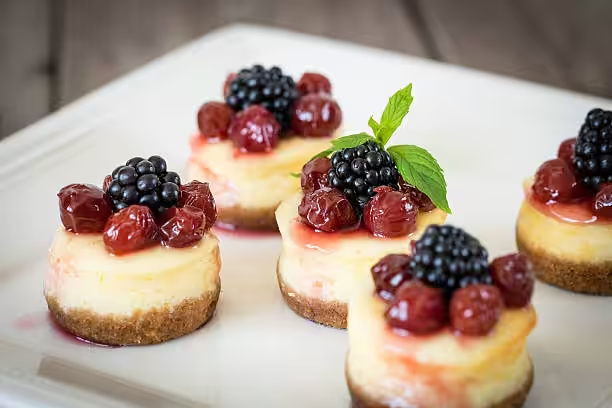
- Fruit-Topped Mini Cheesecakes: Add fresh berries or fruit puree on top.
- Pumpkin Mini Cheesecakes: Mix in pumpkin puree and spices for a fall twist.
- Dairy-Free and Gluten-Free: Use vegan cream cheese and gluten-free crusts if needed.
Popular Mini Cheesecake Variations
There are endless ways to change up mini cheesecakes so everyone finds one they love:
- No-Bake Mini Cheesecakes: No oven needed, perfect for hot weather.
- Fruit-Topped Mini Cheesecakes: Pile them high with strawberries, blueberries or cherries.
- Chocolate Mini Cheesecakes: Both crust and filling get that chocolate treatment.
- Pumpkin Mini Cheesecakes: Warm spices and pumpkin are a great fall pick.
Serving Suggestions
Serving mini cheesecakes nice and pretty makes them even more tempting. Try these ideas:
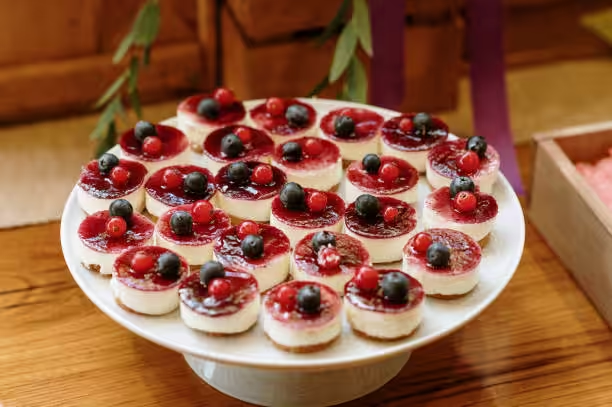
- Presentation Tips: Arrange them on a pretty platter and add a swirl of whipped cream.
- Pairing with Drinks: Coffee, tea, or a dessert wine can be a great match.
- Event Ideas: Use cupcake stands or individual boxes for a cute look at parties.
Storage and Freezing Tips
Keep your mini cheesecakes fresh with these storage tricks:
- Fridge: Store in an airtight container for up to a week.
- Freezer: Wrap each one in plastic wrap and put in a freezer container. They last about three months.
- Thawing: Move them to the fridge overnight before you serve.
- Shelf Life: A week in the fridge or a few months in the freezer without losing much taste.
FAQs: Mini Cheesecakes
- Can I use low-fat cream cheese? You can but it may not be as rich or creamy as full fat.
- How do I stop cracks? Dont overmix or overbake, and a water bath helps keep moisture in.
- Can I make them ahead? Yes, you can bake them a day or two before your event.
- Other toppings? Try caramel, chocolate sauce, chopped nuts or crushed cookies.
Conclusion
Mini cheesecakes are a simple way to serve something indulgent without going overboard. They are super versatile so you can mix and match flavors, crusts, and toppings to fit any taste or diet. Have fun experimenting and share your creations next time you host a gathering!
Mini Cheesecakes
Equipment
- 1 muffin tin
- 12 cupcake liners
- 1 mixing bowl
- 1 electric mixer or whisk
- 1 rubber spatula
- 1 measuring cups and spoons
- 1 cooling rack
Ingredients
- 1 cup graham cracker crumbs
- 2 tablespoons sugar
- 4 tablespoons unsalted butter, melted
- 16 ounces cream cheese, softened
- ½ cup granulated sugar
- 1 teaspoon vanilla extract
- 2 large eggs
- ½ cup sour cream
Instructions
- Preheat your oven to 325°F (160°C). Line a muffin tin with cupcake liners and set aside.
- In a mixing bowl, combine the graham cracker crumbs, sugar, and melted butter. Stir until the mixture resembles wet sand.
- Evenly distribute the crust mixture into the bottom of each cupcake liner, pressing down firmly to create a compact layer. Bake for 5 minutes, then remove from the oven and let cool while preparing the filling.
- In another bowl, beat the softened cream cheese with an electric mixer until smooth. Gradually add the granulated sugar and vanilla extract, mixing until well combined.
- Add the eggs, one at a time, mixing just until blended after each addition. Be careful not to overmix.
- Gently fold in the sour cream until the mixture is smooth and creamy.
- Pour the cheesecake filling over the cooled crusts, filling each liner about ¾ full.
- Bake in the preheated oven for 10-12 minutes, or until the edges are set but the centers still have a slight jiggle.
- Remove from the oven and let cool in the muffin tin for about 10 minutes before transferring to a cooling rack to cool completely.
- Once cooled, refrigerate the mini cheesecakes for at least 2 hours, preferably overnight, to set properly.
Leave a Reply