
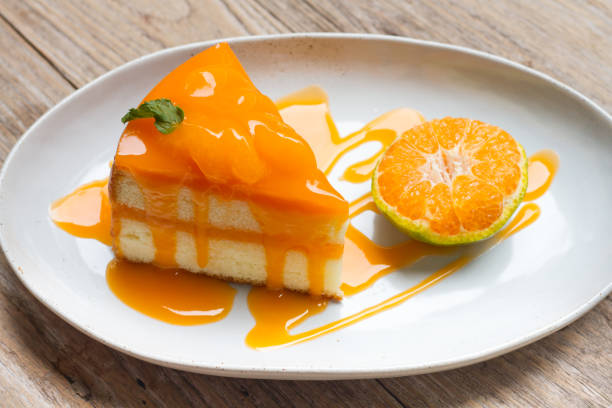
When i first tried Orange Creamsicle Cheesecake, i was kinda shocked how good it was. The sweet orange taste mixed with creamy vanilla is like a big splash of summer in your mouth. It reminds me of running around in bare feet and eating cold pops on a hot day. This idea of mixing cheesecake and that bright orange flavor makes me really happy.
Cheesecake is a super popular dessert all over the world, and it’s easy to see why. Its smooth, soft texture just melts in your mouth. You can add almost any flavor you want, from strawberries to chocolate chips. By mixing in Orange Creamsicle flavor, you get a fun twist on a classic treat. It’s light, but still feels rich, and the orange gives it a fresh zing.
In this post, we’ll talk about what makes this cheesecake so special, list the things you need, go over the tools that help you bake it right, and then give you step-by-step directions. You’ll also find some tips to avoid common mistakes and cool ways to change it up if you want. Get ready for a dessert thats sweet, creamy, and totally refreshing!
What Makes Orange Creamsicle Cheesecake Unique?
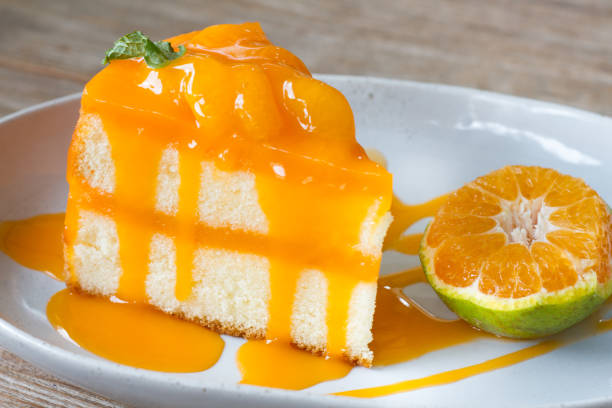
This cheesecake taste like a creamsicle you get at the ice cream truck. It’s a simple mix of sweet orange and smooth vanilla. That bright tang from the orange makes your mouth wake up, and the cream cheese filling feels so velvety. Together it’s a dessert that’s both light and indulgent.
Normal cheesecakes are already creamy and rich, but when you add orange juice and orange zest, it gets a fresh twist. The smell when it’s baking is amazing, too. Every bite is like a little summer party in your mouth.
Ingredients for Orange Creamsicle Cheesecake
To make this cheesecake, you’ll need a few basic things:
- For the crust:
- Graham crackers
- Sugar
- Butter
- For the filling:
- Cream cheese
- Sugar
- Eggs
- Orange juice and zest
- Vanilla extract
- For the topping:
- Whipped cream
- Orange slices or extra zest
If you need a gluten-free version, just use gluten-free graham crackers. For a vegan option, try a plant-based cream cheese, flax eggs, and dairy-free whipped topping.
Equipment Needed
Here’s what you should have on hand before you start baking:
- Springform pan: Easier to take out your cheesecake without making a mess.
- Mixing bowls: A couple of sizes so you can mix crust and filling.
- Electric mixer: A hand or stand mixer helps get the cream cheese super smooth.
- Spatula: Good for scraping down the bowl and folding in ingredients.
- Measuring cups and spoons: Baking works best when you measure right.
- Oven thermometer: Makes sure your oven isn’t too hot or too cold.
- Cooling rack: Lets your cheesecake cool evenly after baking.
Directions for Making Orange Creamsicle Cheesecake
- Prepare the crust:
Preheat oven to 325°F (160°C). Crush graham crackers and mix them with sugar and melted butter. Press the mix into the bottom of a greased 9-inch springform pan. Bake for 10 minutes. Let it cool while you make the filling.
- Make the filling:
Beat cream cheese in a large bowl until it’s smooth. Add sugar and mix well. Crack in eggs one at a time, mixing after each. Stir in orange juice, zest, and vanilla. Don’t overmix or you’ll get too much air.
- Bake the cheesecake:
Pour the filling onto the crust. Bake for 55–60 minutes until the edges look set and the center still jiggles a bit. Turn off oven, open the door a little, and let the cheesecake cool inside for about an hour. This helps stop cracks.
- Cool and chill:
After it cools in oven, take it out and set on counter to cool more. Then put it in the fridge for at least 4 hours or overnight so it gets firm.
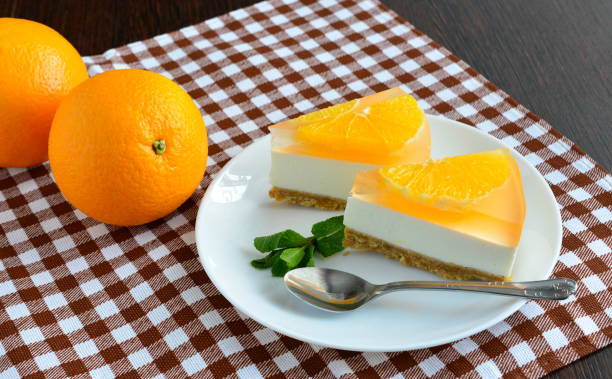
- Add toppings:
Top with whipped cream and orange slices or zest before you serve. Slice and enjoy!
Tips for Perfecting Your Orange Creamsicle Cheesecake
- Use a water bath: Wrap the pan in foil and set it in a bigger pan with hot water. This keeps it moist and stops cracks.
- Cool slowly: Let the cheesecake cool in the oven with the door cracked. Sudden temp changes can make cracks.
- Try different sauces: A raspberry or strawberry sauce is a nice contrast. Or add a scoop of vanilla ice cream when you serve.
Orange Creamsicle Cheesecake
Equipment
- 1 9-inch springform pan
- 1 mixing bowl
- 1 electric mixer
- 1 rubber spatula
- 1 set measuring cups and spoons
- 1 zester or grater
- 1 whisk
- 1 aluminum foil
Ingredients
- 1 ½ cups graham cracker crumbs
- ½ cup unsalted butter, melted
- ¼ cup granulated sugar
- 3 packages cream cheese, softened Each package is 8 ounces.
- 1 cup granulated sugar
- 3 large eggs
- 1 tablespoon vanilla extract
- ⅓ cup fresh orange juice
- Zest of 1 large orange orange zest Use for cheesecake filling.
- 1 cup sour cream
- ¼ cup powdered sugar
- Zest of 1 orange orange zest Use for topping.
- 2 tablespoons fresh orange juice Use for topping.
Instructions
- Preheat the oven to 325°F (160°C). Wrap the outside of a 9-inch springform pan with aluminum foil to prevent leaks.
- In a mixing bowl, combine graham cracker crumbs, melted butter, and granulated sugar. Mix until well combined and resembles wet sand.
- Press the mixture firmly into the bottom of the springform pan to form an even layer. Set aside.
- In a separate mixing bowl, use an electric mixer to beat the softened cream cheese until smooth and creamy.
- Gradually add the granulated sugar and beat until fully incorporated.
- Add the eggs one at a time, mixing on low speed after each addition until just blended.
- Mix in the vanilla extract, fresh orange juice, and orange zest until well combined.
- Pour the cheesecake filling over the crust and smooth the top with a rubber spatula.
- Bake in the preheated oven for 60 minutes, or until the center is set but still slightly jiggly.
- Turn off the oven and crack the door, allowing the cheesecake to cool slowly for 1 hour.
- Once cooled, remove from the oven and refrigerate for at least 4 hours or overnight to firm up.
- For the topping, whisk together sour cream, powdered sugar, orange zest, and fresh orange juice until smooth.
- Spread the orange topping over the chilled cheesecake just before serving.
- Remove the cheesecake from the springform pan and slice into servings. Enjoy!


Leave a Reply