
You catch the smell through the steam vent and suddenly you are starving. That tangy sweet aroma hits you right in the gut, and your mouth starts watering like crazy. It’s that familiar scent that makes you wanna drop everything and eat right away.
Inside the pressure cooker, chicken pieces are getting tender pulled to perfection while that sealing ring holds in all the flavors. You hear that valve hiss and you sense the pressure build, knowing that the sauce is thickening just right. The kitchen feels like it’s filled with yum, and you can’t wait to try it.
Sometimes you remember the last time you made sweet and sour chicken, but this time something’s better. It’s the sauce this round; it’s that perfectly balanced zing of pineapple juice, vinegar, and brown sugar that gets you every time. Dang, you gotta have a bite now.
Why This Recipe Works Every Single Time
- The pressure cooker tender pulls chicken fast without drying it out.
- Balance of tangy pineapple and savory soy sauce hits the spot.
- Using cornstarch twice makes the sauce thicken perfectly and chickens get crispy first.
- The sealing ring traps in flavors so they infuse better than a normal simmer.
- Natural release lets the chicken rest and soak up extra sauce.
What Goes Into the Pot Today
- 1¼ lbs boneless skinless chicken breasts or thighs, cut into bite-sized pieces
- ¼ cup fresh pineapple juice for that fruity tang
- 2 cloves garlic minced to add a punch
- 2 tablespoons water to balance the sauce
- 2 tablespoons apple cider vinegar, gives the zing
- 1 tablespoon low sodium soy sauce for saltiness
- 2 tablespoons brown sugar to sweeten it up right
- 2 tablespoons ketchup, helping with that crimson color and depth
- 1 tablespoon cornstarch for thickening the sauce
- ⅓ cup cornstarch to toss the chicken before frying
- 2-3 tablespoons vegetable or canola oil for crisping the chicken
- 1 medium onion, large diced for some bite
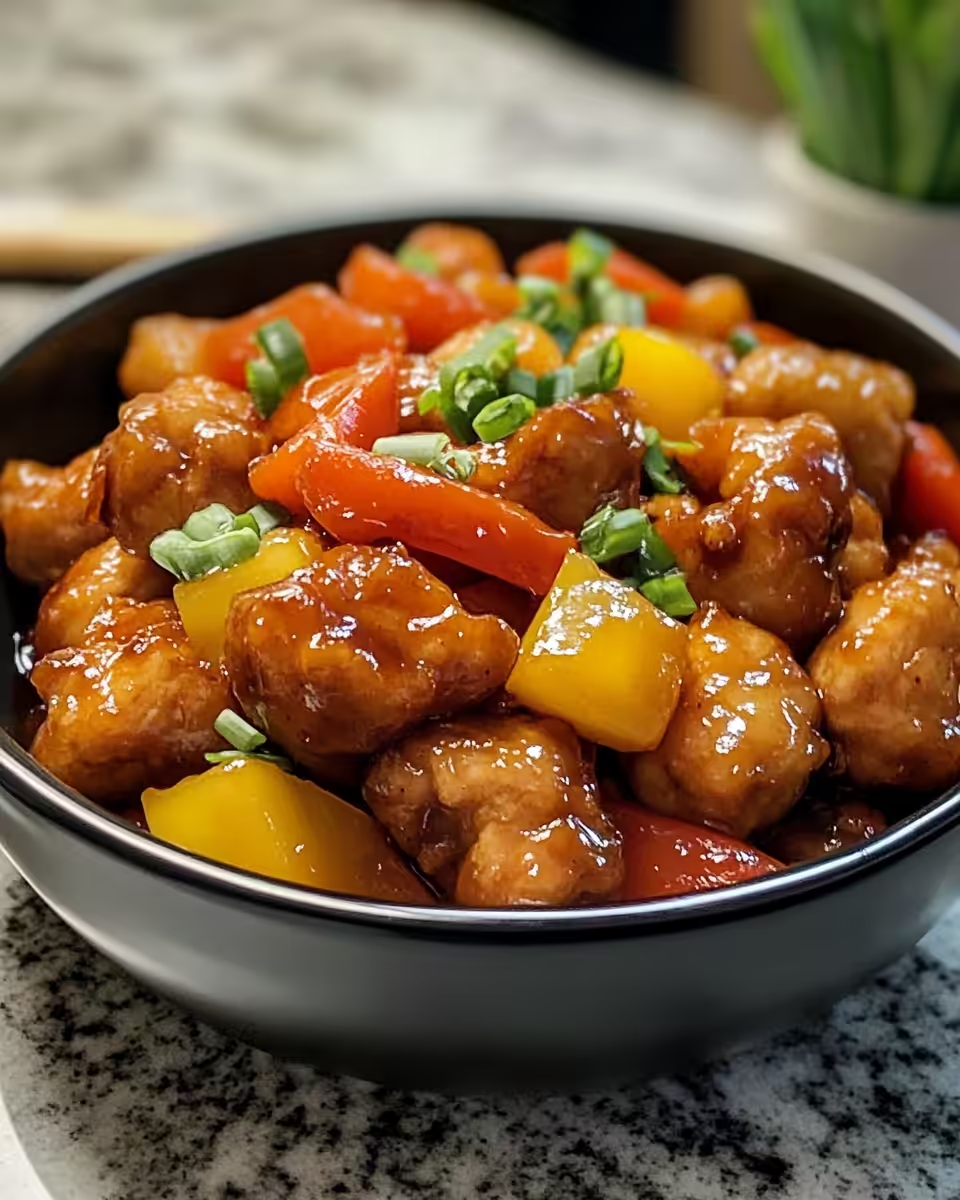
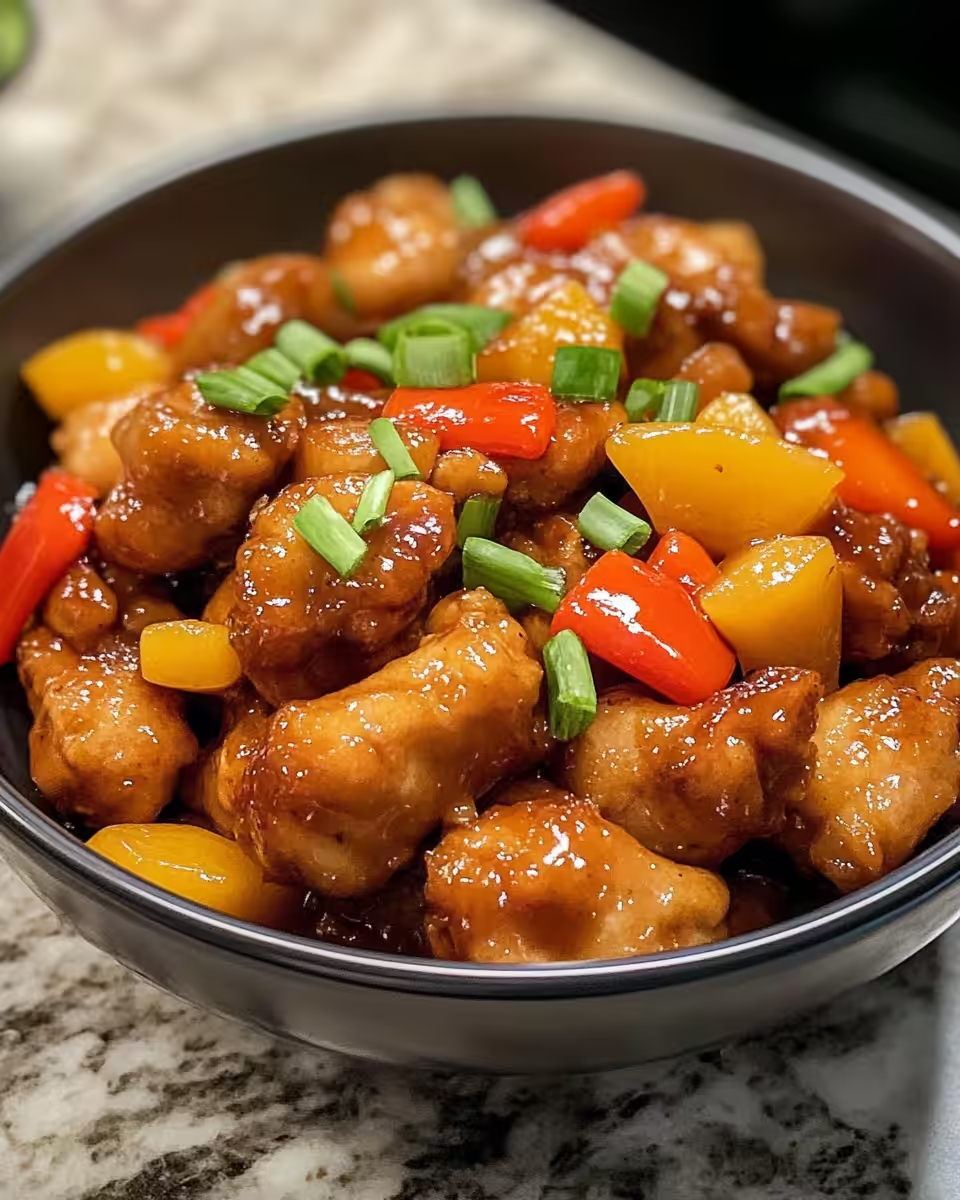
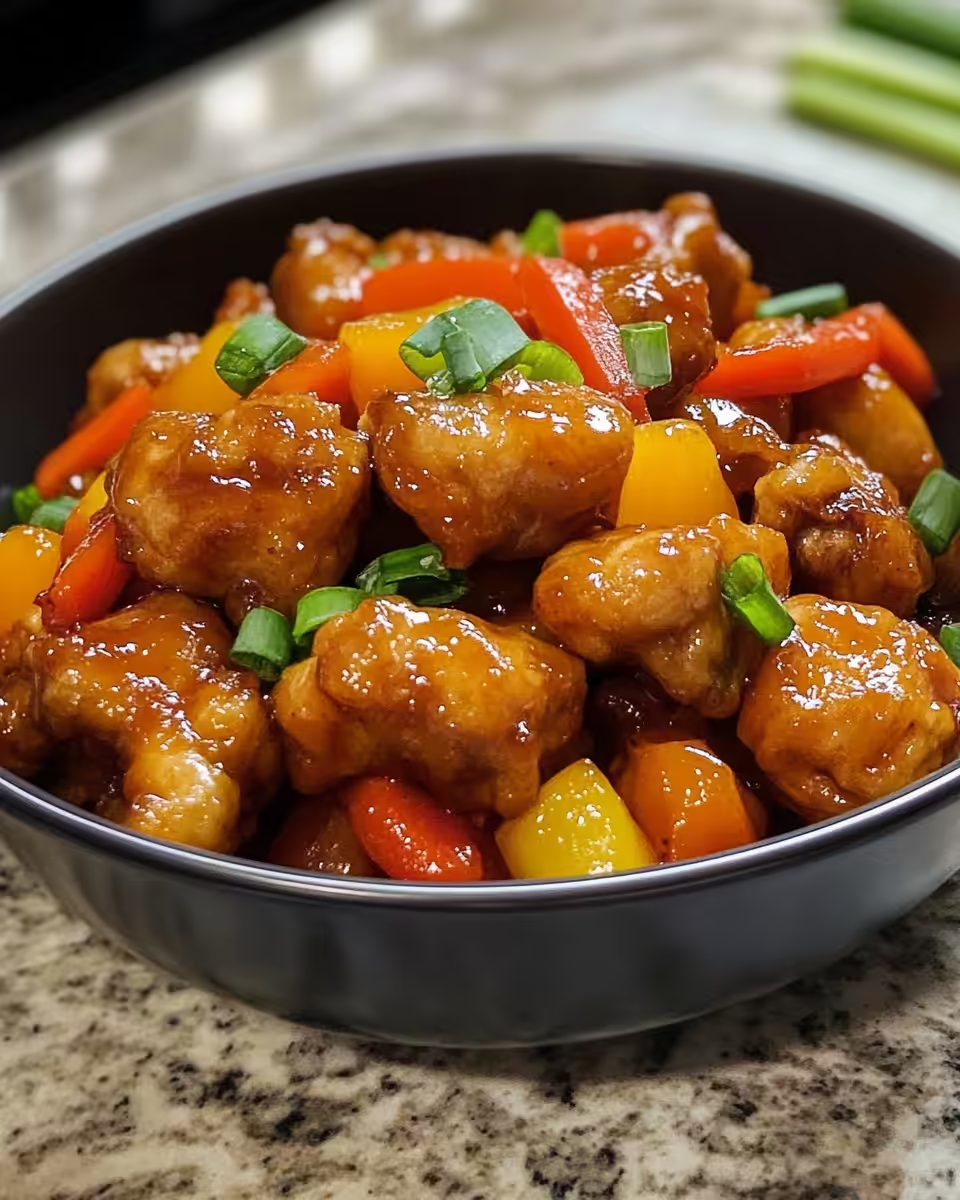
- 1 green bell pepper large dice and 1 red bell pepper large dice for color and crunch
- 1½ cups fresh pineapple chunks to add sweetness and texture
- 2 pinches red pepper flakes for a subtle heat kick
- Salt and pepper to taste
- Optional stuff like cooked rice or Chinese noodles to serve
The Full Pressure Cooker Journey
First, you get that sauce ready by whisking pineapple juice, garlic, water, apple cider vinegar, soy sauce, brown sugar, ketchup, and one tablespoon of cornstarch in a small bowl. Set it aside for now.
Next, pat dry the chicken pieces with paper towels so the cornstarch sticks better. Toss the chicken in the ⅓ cup cornstarch until every bit is coated evenly.
Heat up your skillet or wok on medium-high and add a thin layer of oil. You want it just enough to get things crispy but not drenched in grease.
Carefully add chicken in batches and cook until golden and crispy all around. This takes about 5-7 minutes. Then scoop them out and set aside.
Pour the sauce you mixed earlier into the skillet. Bring it to a simmer, stirring constantly. You’ll notice the sauce thickens after 2-3 minutes, getting glossy and perfect.
Return the chicken to the skillet, toss to coat well, and cook for another 2-3 minutes until everything’s heated through and mingled together. Toss in onions, bell peppers, pineapples, and red pepper flakes now if you want the veggies to stay crisp.
Turn off the heat and let the pressure cooker do its thing with a natural release. This lets the flavors kinda settle and get cozy together before serving it hot over rice or noodles.
Smart Shortcuts for Busy Days
- Use pre-cut chicken from the store. Saves you some slicing time and still works real good.
- Grab a jar of pineapple juice instead of fresh if you’re in a rush. It still gives you that sweet tang.
- Skip the onion and bell peppers if you don’t have them handy. Just toss in a handful of frozen veggies to keep it quick.
That First Bite Moment
You pick up your fork and the chicken feels tender yet nice and crispy around the edges. That first bite hits you with juicy sweetness mingled with a little heat from the red pepper flakes.
The tangy pineapple juice cuts through the richness, leaving you wanting more. You can sorta taste the garlic and vinegar dancing in the background.
Crunchy bell peppers give a refreshing snap against the tender chicken. It’s like a combo of textures that just clicks.
The sauce clings perfectly, each piece coated in that glossy sheen that makes eating this kinda addictive. You sit back satisfied, thinking yeah, this works dang well.
Your Leftover Strategy Guide
- Cool your leftovers to room temp before storing in airtight containers to keep the tender pull of chicken intact.
- Keep sauce separate if you wanna reheat and keep veggies from getting soggy, then mix before serving.
- Store in the fridge for up to 3 days. Reheat gently on the stove or microwave with a splash of water so it doesn’t dry out.
- Freeze in portioned bags if you wanna save it for later. Thaw overnight in the fridge and reheat fully before eating.
The FAQ Section You Actually Need
- Can I use chicken thighs instead of breasts? Yup, chicken thighs work real good here and tend to stay juicy and flavorful.
- What if my sauce isn’t thickening? Try stirring more while simmering, or add a little extra cornstarch mixed in water and cook till it glossy.
- Do I need to brown the chicken first? It’s best to brown it for that crispy texture, but you could skip it if you’re short on time.
- How do I know when to natural release? After cooking, just let the pressure cooker sit without opening the valve until it cools down and the pressure drops.
- Can I swap pineapple chunks for canned? Sure thing, canned works just fine but drain them to avoid extra liquid making sauce runny.
- Is this recipe spicy? Only a little from the red pepper flakes. You can adjust or skip if you don’t like heat at all.

Sweet and Sour Chicken Pressure Cooker Recipe
Equipment
- 1 Mixing bowl Large
Ingredients
Main ingredients
- 1¼ lbs Boneless skinless chicken breasts or thighs cut into bite-sized pieces
- ¼ cup Fresh pineapple juice for fruity tang
- 2 cloves Garlic minced
- 2 tablespoons Water
- 2 tablespoons Apple cider vinegar
- 1 tablespoon Low sodium soy sauce
- 2 tablespoons Brown sugar
- 2 tablespoons Ketchup
- 1 tablespoon Cornstarch for thickening the sauce
- ⅓ cup Cornstarch to toss the chicken before frying
- 2-3 tablespoons Vegetable or canola oil for crisping chicken
- 1 medium Onion large diced
- 1 Green bell pepper large diced
- 1 Red bell pepper large diced
- 1½ cups Fresh pineapple chunks
- 2 pinches Red pepper flakes
- Salt and pepper to taste
- Cooked rice or Chinese noodles optional, to serve
Instructions
Instructions
- Whisk together pineapple juice, garlic, water, vinegar, soy sauce, brown sugar, ketchup, and 1 tablespoon cornstarch in a bowl. Set aside.
- Pat chicken dry and coat with ⅓ cup cornstarch until evenly coated.
- Heat oil in a skillet on medium-high. Fry chicken in batches until golden and crispy, about 5-7 minutes. Set aside.
- Add the pre-mixed sauce to the skillet and simmer while stirring until thickened and glossy, 2-3 minutes.
- Add chicken back into the skillet. Cook for another 2-3 minutes to coat and reheat.
- Toss in onion, bell peppers, pineapple chunks, and red pepper flakes. Stir to combine.
- Turn off heat, allow to naturally release flavor, and serve hot over rice or noodles.


Leave a Reply