
You don’t need fancy gear or hours in the kitchen to make these snack wonders. Cheesy Taco Sticks is basically a tortilla stuffed with gooey cheese and taco flavor, rolled up and baked till crispy. Its the kind of thing that gets everyone asking for more, whether you got a party goin on or just need a fast dinner fix.
Taco-style snacks have blowed up lately, and you see new twists all the time. From taco cups to loaded nachos, people love mixing flavors and textures. Cheesy Taco Sticks takes that fun idea up a notch. The cheesy goo inside meets the zesty taco seasoning, and you get a treat that feels fancy but is easy enough for any night.
In this article, im going to talk about why Cheesy Taco Sticks are so craveable, when you should serve them, and everything you need to make em at home. You’ll get the ingredient list, step-by-step directions, plus tips for switching things up if you wanna suit dietary needs or try a different twist.
The Allure of Cheesy Taco Sticks
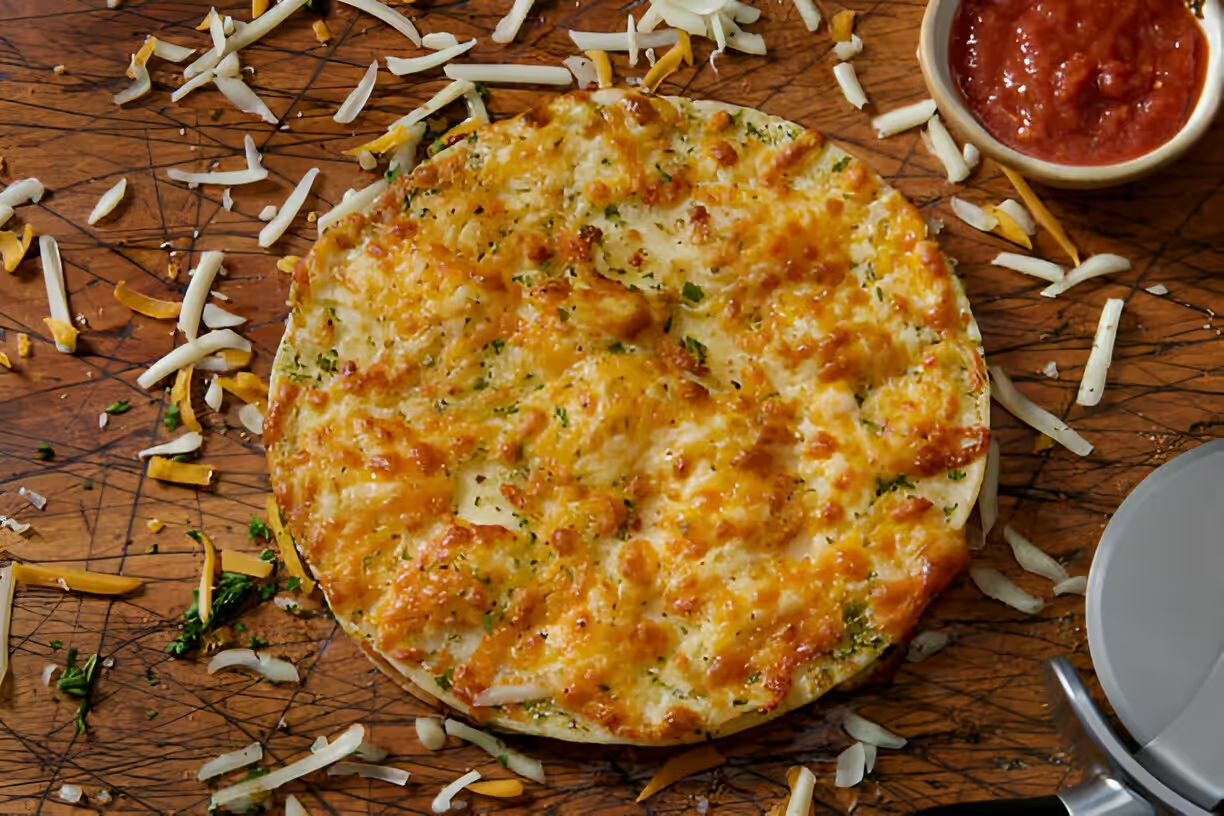
Cheesy Taco Sticks is a tasty blend of rich cheese and bold taco spice. You can use sharp cheddar, creamy Monterey Jack, or even a spicy Mexican blend – whatever you got. Then you sprinkle on the taco seasoning and roll it all up in a tortilla. The end result is just pure yum.
What makes these sticks special is the texture contrast. You get a golden, crunchy shell on the outside, and a melty, cheesy center that stretches when you bite. That crackly crunch followed by warm cheese makes it so hard to eat just one.
Ideal Occasions for Cheesy Taco Sticks
Cheesy Taco Sticks fit so many moments. They are perfect for parties cause you can share em easy. Folks love grabbing a few while they chat or play games. They also rock on game day, right next to salsa or guac, so everyone can snack without missing the big play.
Plus, when weekday evenings get crazy, these sticks can be a lifesaver. They take minutes to prep and bake, and you can fill em with ground beef, shredded chicken, or beans and veggies if you want. Kids dig em and grown ups do too.

Ingredients for Cheesy Taco Sticks
Before you start, gather everything below:
- 4 large flour tortillas
- 2 cups shredded cheese (cheddar, Monterey Jack, or a Mexican blend)
- 1 packet taco seasoning
- 1 cup cooked protein (ground beef, chicken, or beans) – optional
- Cooking oil for brushing
- Salsa or guacamole for dipping (optional)
Directions: How to Make Cheesy Taco Sticks
Step-by-Step Instructions
- Preheat the oven: Set it to 375°F (190°C) so it’s hot when you’re ready to bake.
- Mix the filling: If you’re using meat or beans, stir in the taco seasoning. Let it sit a minute.
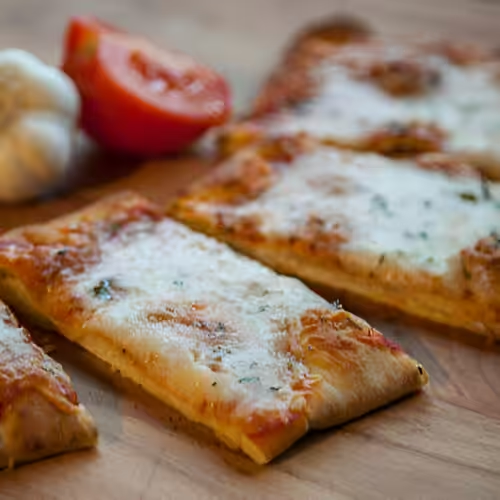
- Assemble sticks: Lay a tortilla flat, sprinkle on cheese and the seasoned filling. Roll it up tight and put seam-side down on a baking sheet lined with parchment.
- Brush and bake: Lightly brush each roll with a bit of oil. Bake about 15–20 minutes, until golden and crispy.
- Serve: Let them cool a bit, slice into sticks, and dip in salsa or guac. Then dive in.
Tips for Perfect Taco Sticks
- Bake or fry: Baking is easier, frying gives extra crunch.
- Fillings: Try different cheeses or add peppers and onions.
- Dips: Sour cream, fresh guacamole, or your fave salsa all work.
Nutritional Information
Here’s roughly what you’re lookin at per serving (depending on your choices):
- Calories: About 240
- Protein: 12g
- Carbs: 30g
- Fat: 10g
They can be a nice treat if you eat em in moderation.
Storing and Reheating Cheesy Taco Sticks
Storage Tips
- Refrigerate: Keep leftovers in an airtight container for 3–4 days.
- Freeze: Wrap each stick in plastic wrap, then bag. Lasts up to 2 months.
Reheating Instructions
- Oven: Preheat to 350°F (175°C) and heat for 10–15 minutes to get the crunch back.
- Microwave: 30–60 seconds is quicker but less crispy.
Customizing Your Cheesy Taco Sticks
Flavor Variations
- Cheese: Pepper jack for spice, mozzarella for mildness.
- Veggies: Add peppers, onions, or spinach for color and nutrients.
- Heat: Throw in jalapeños or use a hotter seasoning mix.
Dietary Considerations
- Gluten-Free: Swap in gluten-free tortillas.
- Vegan: Use plant-based cheese and beans or tofu.
- Low-Carb: Try low-carb tortillas or bake it in a casserole dish without the wrap.
FAQs about Cheesy Taco Sticks
Commonly Asked Questions
- Can I prep ahead? Yes, roll them early, refrigerate, and bake when you’re ready.
- How to avoid sogginess? Don’t overfill with wet ingredients and let cool before storing.
- Best dips? Salsa, guacamole, or sour cream all go great.
Conclusion
Cheesy Taco Sticks bring together cheesy goodness and taco zing in a crunchy, fun snack. Great for parties, game nights, or quick meals, they’re easy to make and even easier to eat. Mix and match ingredients to suit your taste, and enjoy these tasty sticks with friends and family!
Cheesy Taco Sticks
Equipment
- 1 baking sheet
- 1 parchment paper optional
- 1 mixing bowl
- 1 pizza cutter or sharp knife
- 1 oven
Ingredients
- 1 can (8 oz) refrigerated crescent roll dough
- 1 cup cooked ground beef seasoned with taco seasoning
- 1 cup shredded cheddar cheese
- ½ cup salsa
- ¼ cup chopped green onions
- ¼ teaspoon garlic powder
- ¼ teaspoon ground cumin
- as needed spray or oil cooking spray or olive oil for a golden finish
Instructions
- Preheat your oven to 375°F (190°C) and line a baking sheet with parchment paper if desired.
- In a mixing bowl, combine the cooked ground beef, shredded cheddar cheese, salsa, chopped green onions, garlic powder, and ground cumin. Mix until well combined.
- Unroll the crescent roll dough onto a lightly floured surface. Pinch the seams together to create a solid rectangle.
- Using a pizza cutter or sharp knife, cut the dough into strips, roughly 1 inch wide.
- Take a spoonful of the taco filling mixture and place it at the wider end of each dough strip. Roll the dough around the filling, pinching the ends to seal.
- Place the filled taco sticks on the prepared baking sheet. Lightly spray the tops with cooking spray or brush with olive oil for a golden finish.
- Bake in the preheated oven for 15 minutes, or until they are golden brown and cooked through.
- Remove from the oven and let cool for a few minutes before serving. Enjoy with your favorite dipping sauces!

Leave a Reply