
Steam curls up from the valve and your stomach starts talking back. You spot that little hiss from the sealing ring, hinting that the pressure cooker is doing its thing. It’s kinda thrilling how quick this gadget brings the heat and builds that pressure cozy inside.

You feel the excitement rising almost like the steam puffing out when the slow release starts. That moment when you know your treats are gonna be just right, no rushing it here. The valve hiss is your cue to pause and savor the wait, just like a little countdown for yum.
You sense the change in the air around the pot. The steam cues are telling you something good’s about to be revealed. It’s kinda like magic but without needing any tricks, just some pressure and time all working together to get that perfect texture you want.
What Makes Pressure Cooking Win Every Round
- Pressure cookers heat up way faster than your oven, so you save time big time.
- Steam locks flavor in tight thanks to that trusty sealing ring.
- Natural release lets the food finish off gentle and keeps stuff super tender.
- Less mess cause everything cooks in one pot, no extra pans to wash later.
- Moisture stays put, meaning no dried-out goodies, just perfect softness.
- You can multitask while the cooker does its slow release thing, so it fits busy days.
Everything You Need Lined Up
- 24.4 ounces of Red Velvet Oreos (two 12.2 ounces packages, that’s 44 cookies total)
- 8 ounces of cream cheese softened so it’s room temp and easy to mix
- 15 ounces of light green candy melts for that festive, smooth coating
- Red candy hearts to slap on top for the finishing touch
- A food processor to crush up your Oreos nice and fine
- Baking sheet lined with parchment paper so nothing sticks
- A fork or dipping tool for coating those little balls perfectly
- A freezer airtight enough to chill those truffles quick
- And your trusty pressure cooker to speed up the whole process
The Full Pressure Cooker Journey
First thing first, toss your Red Velvet Oreos into the food processor. Pulse until you get fine crumbs, no big chunks allowed. This step sets the base of your treat so don’t rush.
Next, toss in that softened cream cheese. Pulse again until everything looks smooth and combined like a soft dough. The texture here means your balls are gonna hold up good.
Now come the fun part. Scoop small portions of your mixture and roll into about 1-inch balls. Try to make ‘em even so they cook nice and evenly.
Lay those balls on the parchment lined baking sheet. Then, slide them right into the freezer for a quick 20 minutes. This helps 'em firm up before the candy melt bath.
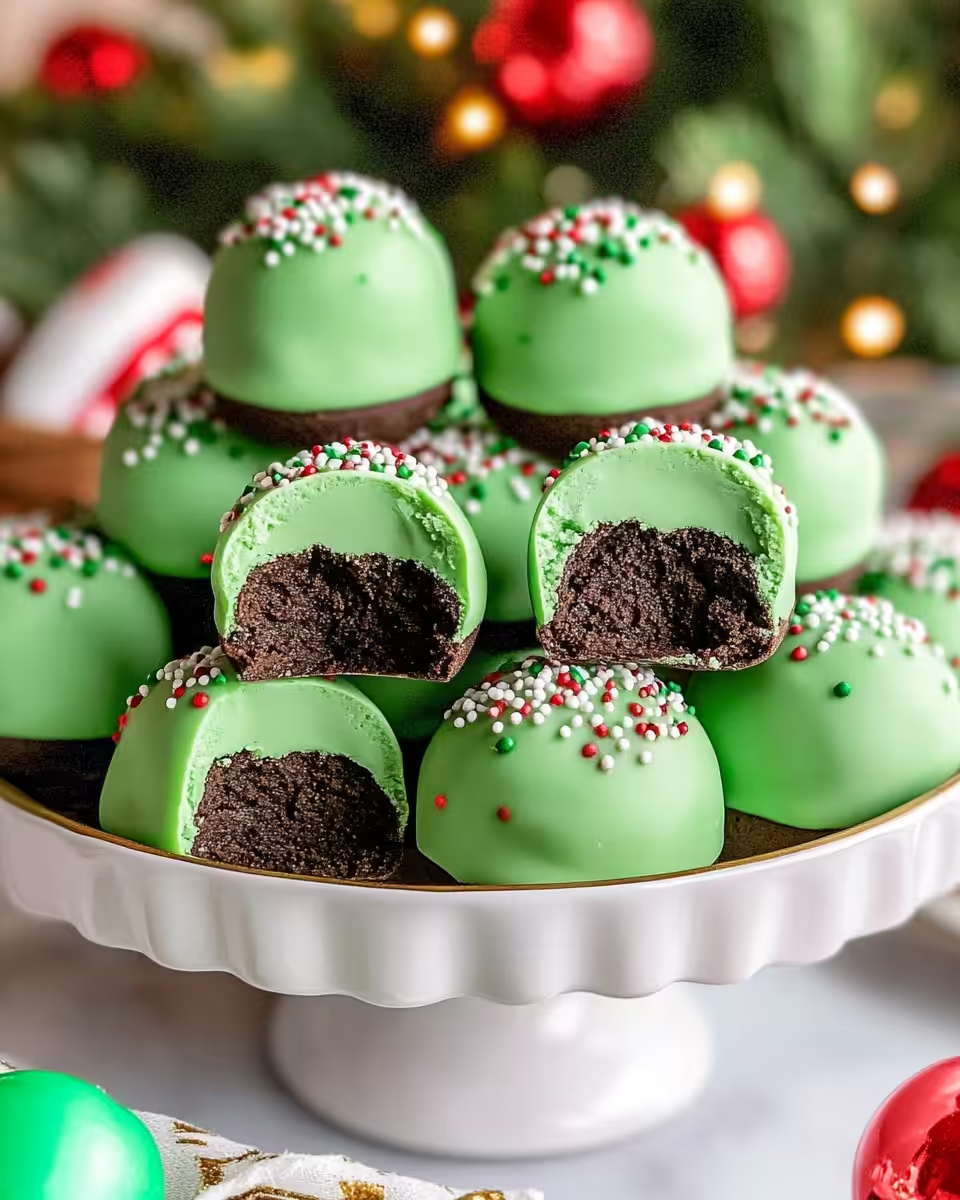
While your balls chill you melt the green candy melts. Follow the package and stir till silky smooth, no lumps allowed! This coating gives you that Grinchy, festive glow.
Dip each Oreo ball into that melted green candy. Use a fork to lift and let extra coating drip right back into the bowl. Place them back on the parchment and don’t forget to press a little red candy heart on top before the coating sets.
Last step—let those babies chill again until the candy hardens and you’re ready to enjoy. Patience pays off when it comes to that perfect snap and creamy inside.
Smart Shortcuts for Busy Days
- Buy the Oreos crushed already if you spot them at your store, then you skip the pulsing step.
- Use pre-softened cream cheese from the deli counter to save time waiting at home.
- Melt candy melts in the microwave in short bursts to speed up the process without burning.
- Freeze balls overnight so in the morning you can just dip and set them while you sip your coffee.
That First Bite Moment

You bite in and the smooth shell cracks gently under your teeth. The crunch feels just right, not too hard or thin. It’s kinda like a little sound of holiday joy.
Then the creamy center hits your tongue all soft and full of sweet Oreo and cream cheese goodness. The red velvet flavor adds that cool twist you weren’t expecting but glad you got.
The candy heart on top gives a tiny tart burst as you chew. It’s a cute little surprise like a secret message from the Grinch himself. It adds that perfect pop of color and sweet zing.
Overall, this treat dances between creamy, crunchy, and sweet. It’s the kinda dessert you wanna share but maybe keep some just for yourself to enjoy later.
Smart Storage That Actually Works
- Store leftover Oreo balls in an airtight container in the fridge to keep them fresh for days.
- Press parchment paper between layers so they don’t stick or lose their shape.
- Use a sealed Tupperware or glass container so no fridge smells sneak in and mess with flavors.
- Freeze them up to a month. When you want one, just let it thaw at room temp for about 10 minutes and enjoy.
The FAQ Section You Actually Need
- Q: Can I skip the cream cheese?
A: Nah, cream cheese is key for the texture and flavor. Without it, balls might be crumbly and dry. - Q: Do I have to use Red Velvet Oreos?
A: You could try other flavors but Red Velvet gives that cool color and taste that screams holiday fun. - Q: How important is the natural release?
A: Super important if you make these in the pressure cooker for anything extra cooked. It helps keep texture right and avoids sudden changes that mess timing. - Q: What if my candy melts get thick?
A: Just add a tiny splash of vegetable oil or microwave a bit more to smooth it out. Keep it dipping-friendly. - Q: Can I make these ahead for a party?
A: Totally! They keep great in the fridge and even better if frozen and thawed before serving. - Q: How do I clean my pressure cooker after this?
A: Wipe out any melted chocolate or cream cheese mess with a warm soapy cloth. Rinse the sealing ring well cause it can trap smells if not cleaned right.

Grinch Oreo Balls Pressure Cooker Recipe You Gonna Love
Equipment
- 1 Food processor
- 1 Baking sheet lined with parchment paper
- 1 Fork or dipping tool
- 1 Freezer for chilling the truffles
- 1 Pressure cooker optional for speed
Ingredients
Main ingredients
- 24.4 ounces Red Velvet Oreos 2 x 12.2oz packages (44 cookies total)
- 8 ounces Cream cheese softened to room temperature
- 15 ounces Light green candy melts for coating
- Red candy hearts for topping
Instructions
Instructions
- Add Red Velvet Oreos to a food processor and pulse into fine crumbs.
- Add softened cream cheese and blend until smooth dough forms.
- Roll mixture into 1-inch balls and place on parchment lined baking sheet.
- Freeze for 20 minutes to firm up the balls before dipping.
- Melt candy melts until smooth per package instructions.
- Dip each ball in melted candy using a fork, allow excess to drip.
- Place dipped balls back on baking sheet and top each with a red candy heart.
- Chill again until candy coating is firm. Serve and enjoy!
Leave a Reply