
The pressure builds and you start counting down minutes until you eat. It’s that moment when you close the lid of the pressure cooker, making sure that sealing ring is snug and the float valve is down. You feel a bit like a scientist waiting for the valve hiss as it reaches the right pressure, knowing dinner’s kinda almost ready.
You keep thinking about that creamy garlic sauce simmering inside, the chicken soaking up all those flavors as the broth depth traps everything in a steamy hug. Your kitchen smells awesome already but you gotta hold on just a little longer until the natural release lets you peek inside.
It’s like this pressure cooker job is a little countdown party just for you. You know that when you lift the lid, you’ll find tender chicken bathing in that silky sauce, garlic scent filling the room, ready for you to dig in. And honestly, that wait feels way worth it.
The Real Reasons You Will Love This Method
- Speedy but hands-off You get dinner done quick without hovering over the stove all night.
- Flavor infusion That sealing ring locks in garlic and herbs perfectly.
- Juicy chicken every time No drying out since the broth depth keeps it moist.
- One pot wonder Fewer dishes means way less cleanup.
- Consistent results The float valve keeps pressure steady, so you get the same delicious meal over and over.
- Perfect creamy sauce The pressure helps thicken sauces faster than traditional simmering.
Your Simple Ingredient Checklist
- 2 boneless, skinless chicken breasts, sliced to make thinner cutlets for faster cooking.
- ½ teaspoon Italian seasoning, brings a subtle herb flavor without overpowering garlic.
- ½ teaspoon salt and ¼ teaspoon freshly cracked black pepper, basic but essential seasoning.
- ¼ cup all-purpose flour, helps get that golden crust on your chicken before pressure cooking.
- 2 tablespoon olive oil for browning your chicken in the skillet.
- 2 tablespoon butter, split to add richness while sautéing garlic and cooking chicken.
- 1 whole garlic bulb, peeled and minced for that strong but mellow garlic taste.
- 1 cup chicken broth plus ¾ cup heavy cream, the combo makes your sauce creamy and luscious.
- ½ teaspoon garlic powder to boost garlic flavor even more.
- Salt and pepper to taste, because sometimes you gotta adjust seasoning when cooking.
Your Complete Cooking Timeline
- Slice chicken breasts horizontally so you got four thinner cutlets. Season both sides with Italian seasoning, salt, and pepper. This gets your flavor base going early.
- Dredge each chicken piece in flour, shaking off the extra. This step's gonna help create a nice crust when you brown the chicken.
- Heat up olive oil and 1 tablespoon butter in a large skillet over medium heat. Add chicken and cook 4-5 minutes each side until golden. Don't overcrowd the pan so it browns well. Then set chicken aside.
- While the chicken cooks, peel all garlic cloves from that bulb. Mince 'em fine so they release all their flavor fast.
- In the same skillet, melt remaining butter and toss in garlic. Sauté for 1-2 minutes till you smell that garlic fragrance but watch it doesn’t burn.
- Add chicken broth to the skillet scraping browned bits off the bottom with a wooden spoon. Let simmer 3-4 minutes so sauce reduces slightly and thickens a bit.
- Stir in heavy cream and bring sauce to a simmer. Cook 3-5 minutes until sauce thickens. Return the chicken to the skillet, spoon sauce over it, and simmer 2-3 minutes to warm through. Done!
Easy Tweaks That Make Life Simple
- Use pre-minced garlic from the jar if you wanna save peeling time, just add less so it ain’t overpowering.
- Skip flour dredging if you’re in a rush but keep in mind it adds that nice crust and sauce thickness.
- Splash a little white wine in the broth step for a fancy twist on flavor.
- Swap heavy cream with half and half for a lighter sauce, it works real good but less rich.
- Double the recipe and freeze leftovers in single portions for crazy easy next-day meals.
When You Finally Get to Eat
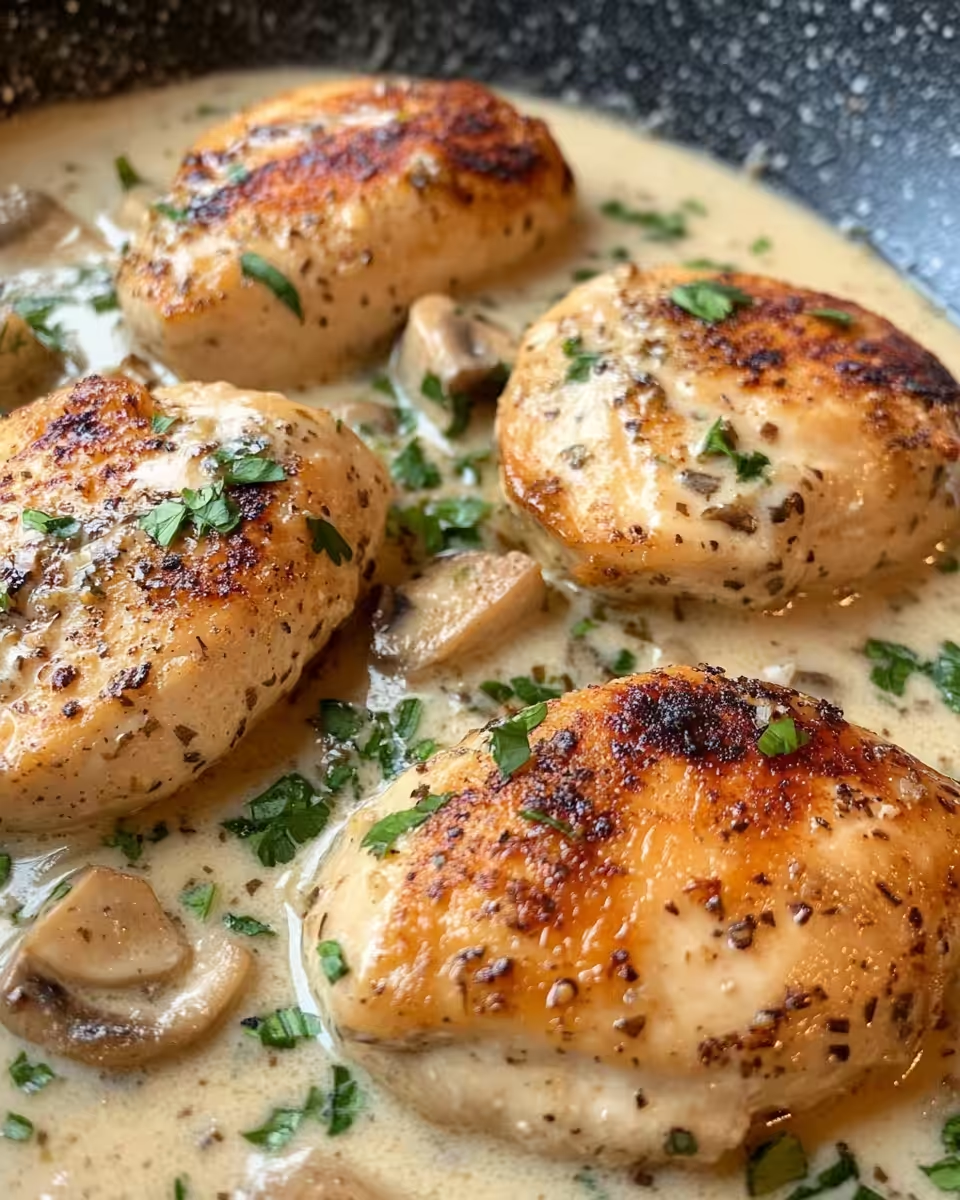
The moment you scoop that creamy garlic chicken onto your plate feels like winning the dinner lottery. You spot the rich sauce clinging to the tender chicken like it was made just for you. The garlic scent fills the air and you feel all warm and cozy already.
Taking the first bite, you taste the juicy chicken soaked in that creamy garlic goodness. It’s got this perfect blend of silky with a faint hit of herbs making your mouth water for more. The sauce is rich but not too heavy, making every bite feel luxurious but easy to enjoy.
You remember why you love pressure cooker recipes so much when dinner comes together fast and tastes like you put in hours. This is the kinda meal that hits the spot after a tough day. You feel pretty sure you’ll be making it again soon.
Keeping Leftovers Fresh and Ready
- Let your creamy garlic chicken cool completely before putting it in an airtight container. This stops extra moisture buildup so leftovers don’t get soggy.
- Store in fridge and try to eat leftovers within 3-4 days for best taste and texture.
- If you wanna freeze, portion into single servings and cover tightly. Freeze up to 2 months and thaw overnight in fridge before reheating.
- Reheat gently in a skillet on low heat or microwave in short bursts stirring in between to keep sauce smooth and avoid drying chicken out.
Your Most Asked Questions Answered
- Q: Can I use chicken thighs instead of breasts? Absolutely. Thighs stay juicy and even more tender but might need a minute or two extra cooking. Just check the float valve and broth depth to make sure pressure builds properly.
- Q: Do I have to brown the chicken first? It’s not totally necessary but browning adds flavor and color that really lifts the dish. Plus it helps the sauce thicken better later.
- Q: What’s natural release and why is it important here? Natural release means you let the pressure cooker sit after cooking so pressure goes down slowly without you touching the valve. It keeps meat juicy and lets flavors settle better.
- Q: Can I replace heavy cream with milk? You could but milk won’t thicken the sauce as well and might make it watery. Heavy cream gives that rich texture that works best.
- Q: How much chicken broth should I use for right broth depth? One cup usually does the trick. Enough to create steam and flavor but not too much to make sauce thin. You’re looking for about ½ inch of broth covering the bottom once chicken’s in.
- Q: What if the float valve doesn’t pop up? That means your pressure cooker isn’t sealing properly. Check the sealing ring for dirt or damage and make sure lid’s locked tight. The valve hiss is your clue pressure’s building up right.
Creamy Garlic Chicken Pressure Cooker Recipe
Equipment
- 1 Skillet Large one for browning and sauce
Ingredients
Main ingredients
- 2 Boneless, skinless chicken breasts sliced to cutlets
- ½ teaspoon Italian seasoning
- ½ teaspoon Salt
- ¼ teaspoon Freshly cracked black pepper
- ¼ cup All-purpose flour
- 2 tablespoon Olive oil
- 2 tablespoon Butter divided
- 1 Garlic bulb peeled and minced
- 1 cup Chicken broth
- ¾ cup Heavy cream
- ½ teaspoon Garlic powder
- Salt and Pepper to taste
Instructions
Instructions
- Slice chicken breasts horizontally into cutlets. Season with Italian seasoning, salt, and pepper.
- Dredge chicken in flour, shaking off excess.
- Heat olive oil and 1 tablespoon butter in skillet. Cook chicken 4-5 minutes each side until golden. Set aside.
- Peel and mince garlic cloves.
- In same skillet, melt remaining butter. Add garlic and sauté 1-2 minutes until fragrant.
- Add chicken broth and scrape browned bits. Simmer 3-4 minutes.
- Stir in heavy cream. Simmer 3-5 minutes until thickened.
- Return chicken to skillet, spoon sauce over, and simmer 2-3 minutes to warm through.


Leave a Reply